Fixing your leaky end cap, or how to make a robot pressurizer
Summary: This blog post is primarily for those who have little hardware experience who have found themselves in a robotics lab. Particularly, if you are a software person working with underwater vehicles for the first time, this is for you. After reading this you will understand how to find a leak on a blue robotics based robot, how to fix a leaky end cap penetrator, and learn about one of WARPLab’s vehicles at WHOI. This was last updated February of 2026. I am not associated with Blue Robotics nor do I make any profit from recommending particular parts.
The Leak
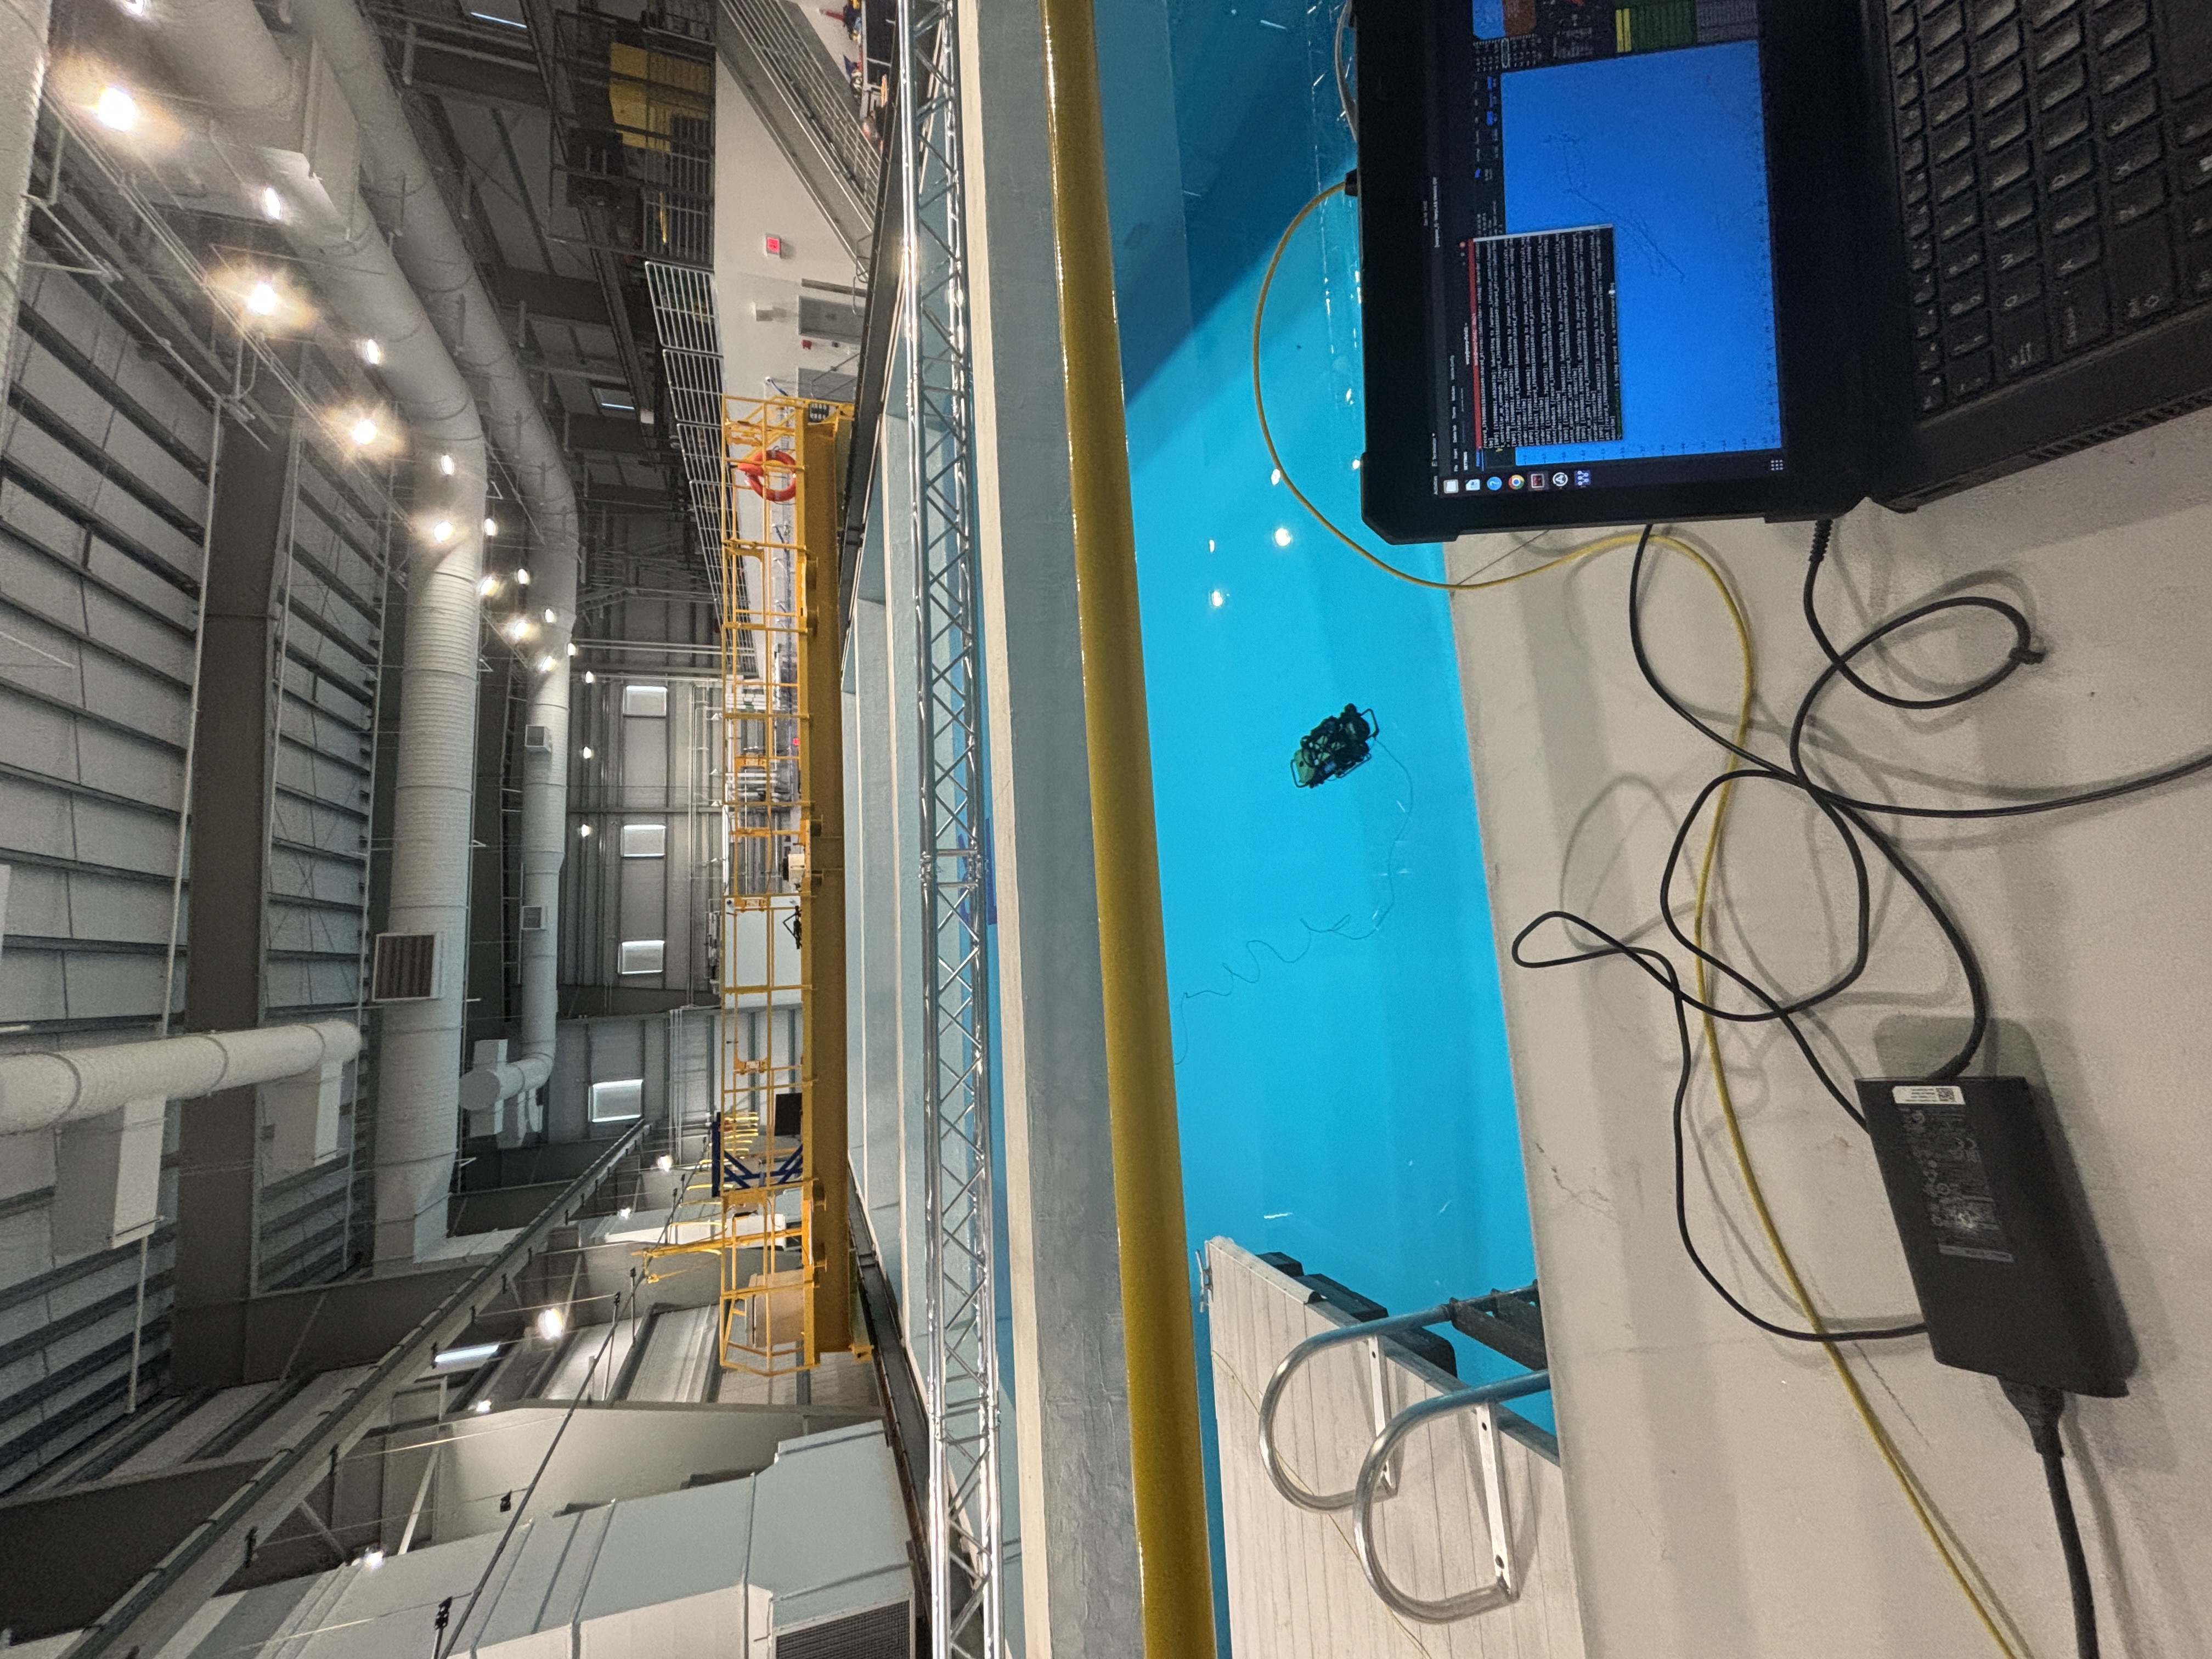
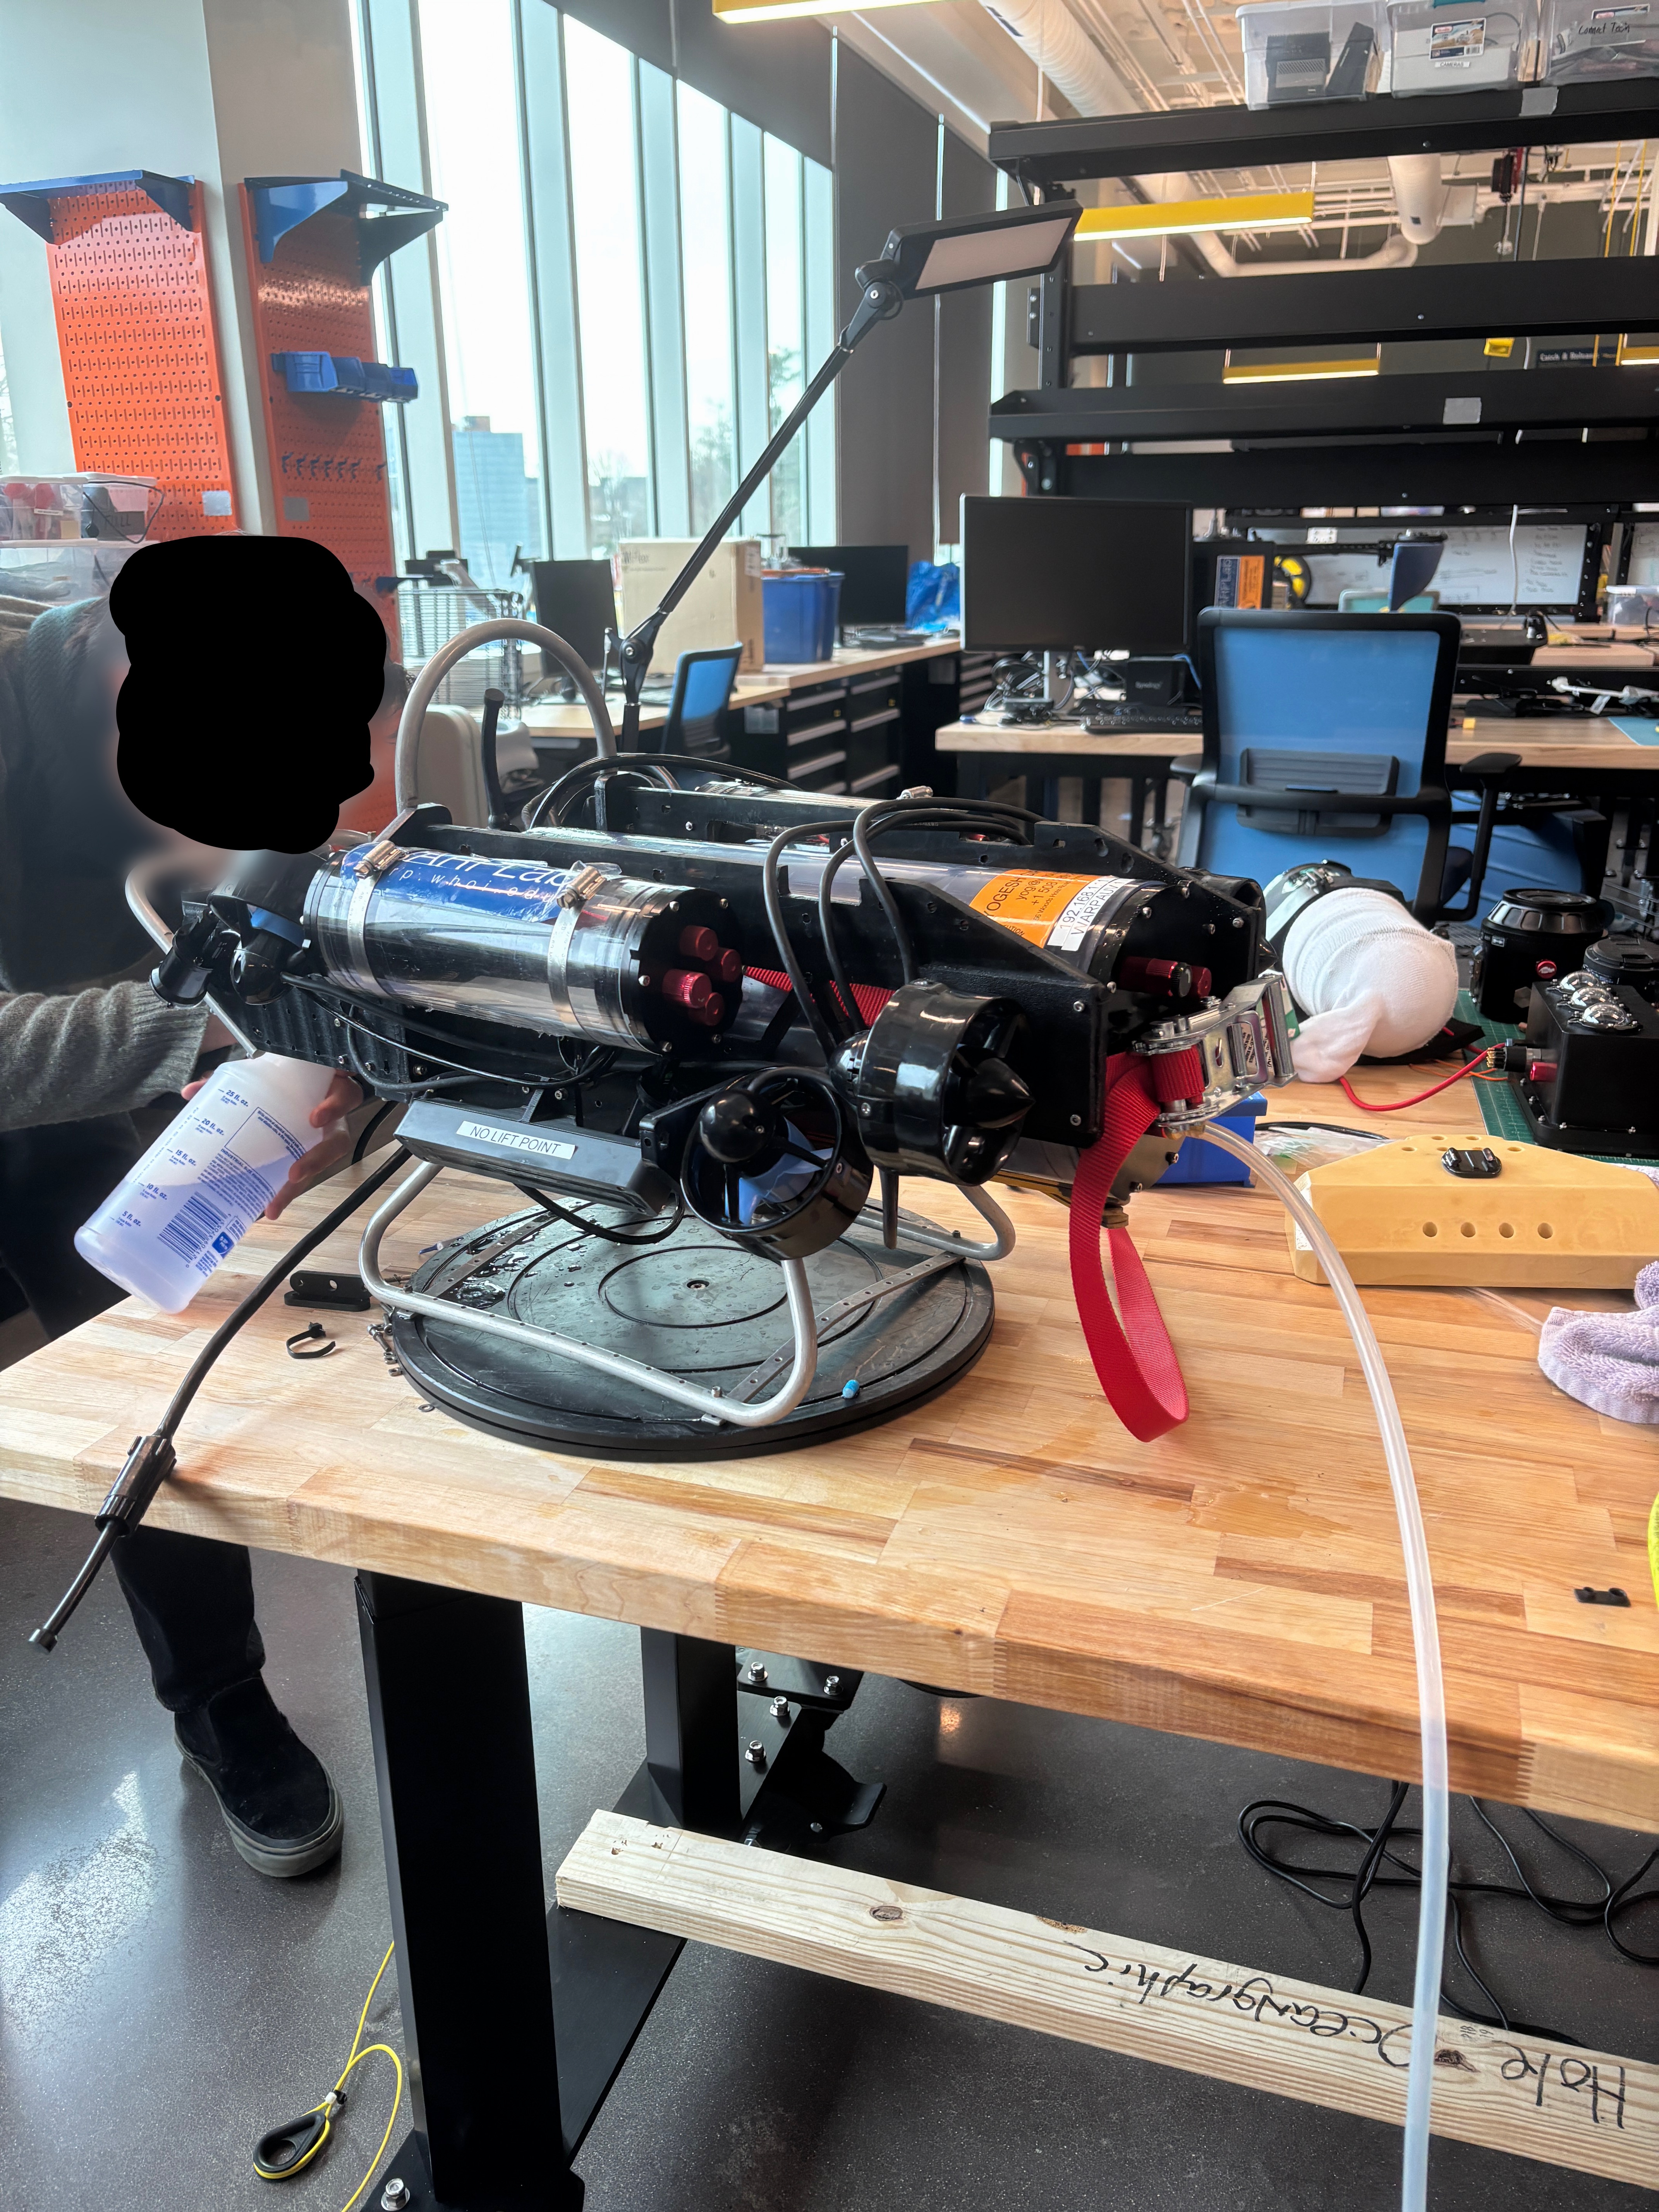
After a long day of testing in MITRE’s Blue Tech research facility, I was feeling happy with my data collection. With their amazing motion capture system, I aquired a nice collection of interesting trajectories. However, my blood pressure spiked when I suddenly saw a leak detected on my laptop’s GUI. Quickly pulling the robot out of the water and inspecting the housing, everything was thankfully okay. Minimal water entered and none of the electronics were damaged. Feeling somewhat relieved, I still worried; I have never found a leak before let alone fixed one. If you happen to be in a similar situation, this guide aims to be of aid. For those with more experience, please feel free to share your advice or tricks with me.
Identifying the Leak
With CUREE back at the lab, I did a housing pressure test in order to obtain a sense of the leak severity. It was a slow leak - fast enough to prevent any sustained testing, but slow enough that readily finding it was challenging. In this situation, you should first look at the end cap o-rings. Are they damaged? Are there hairs or other objects opening airways? You can take them off using a pick, and you can regrease them with MolyKote 111 .
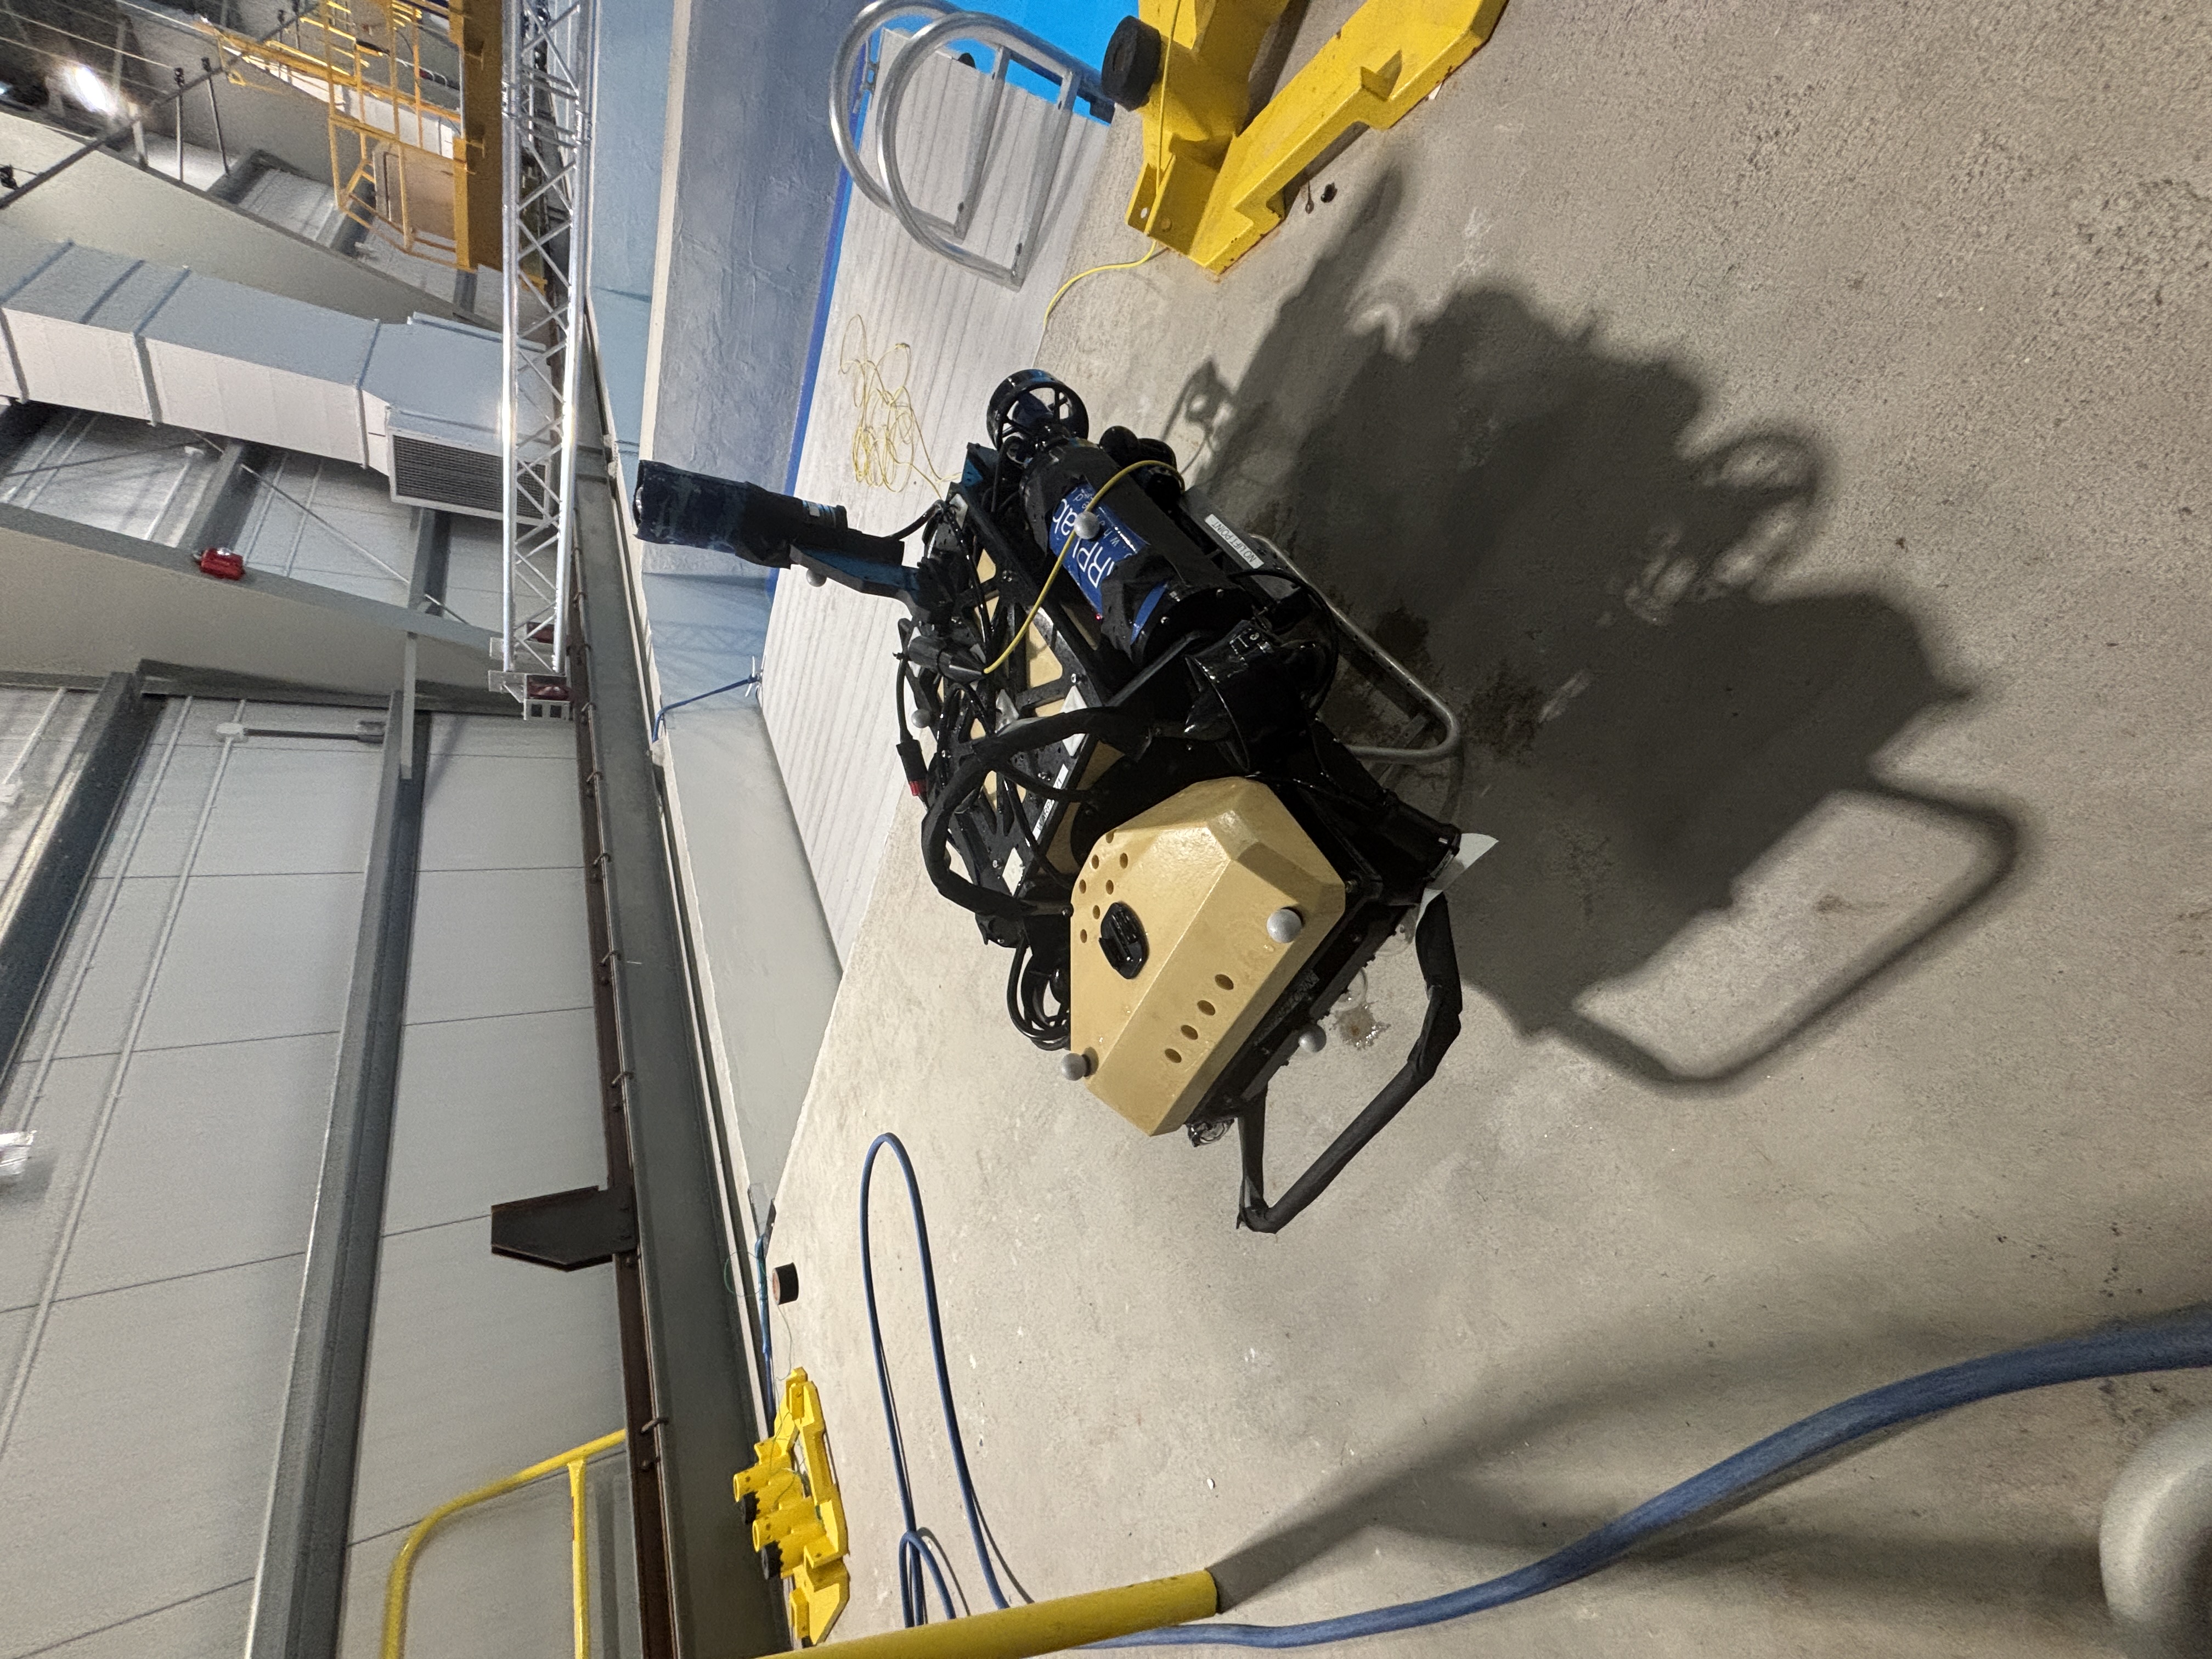
In my case, replacing o-rings and cleaning them did not fix the issue. This narrowed the investigation down to the endcap penetrators or even the lights on the vehicle (they are all connected to the main housing, so the pressure sensor could be detecting a leak from any of them). With so many potential failure points, a colleague recommended pressurizing the vehicle. By increasing the pressure inside the vehicle, I could identify the leak by (a) listening for the leak, and (b) spraying potential failure points with soapy water.
Making your own robot pressurizer
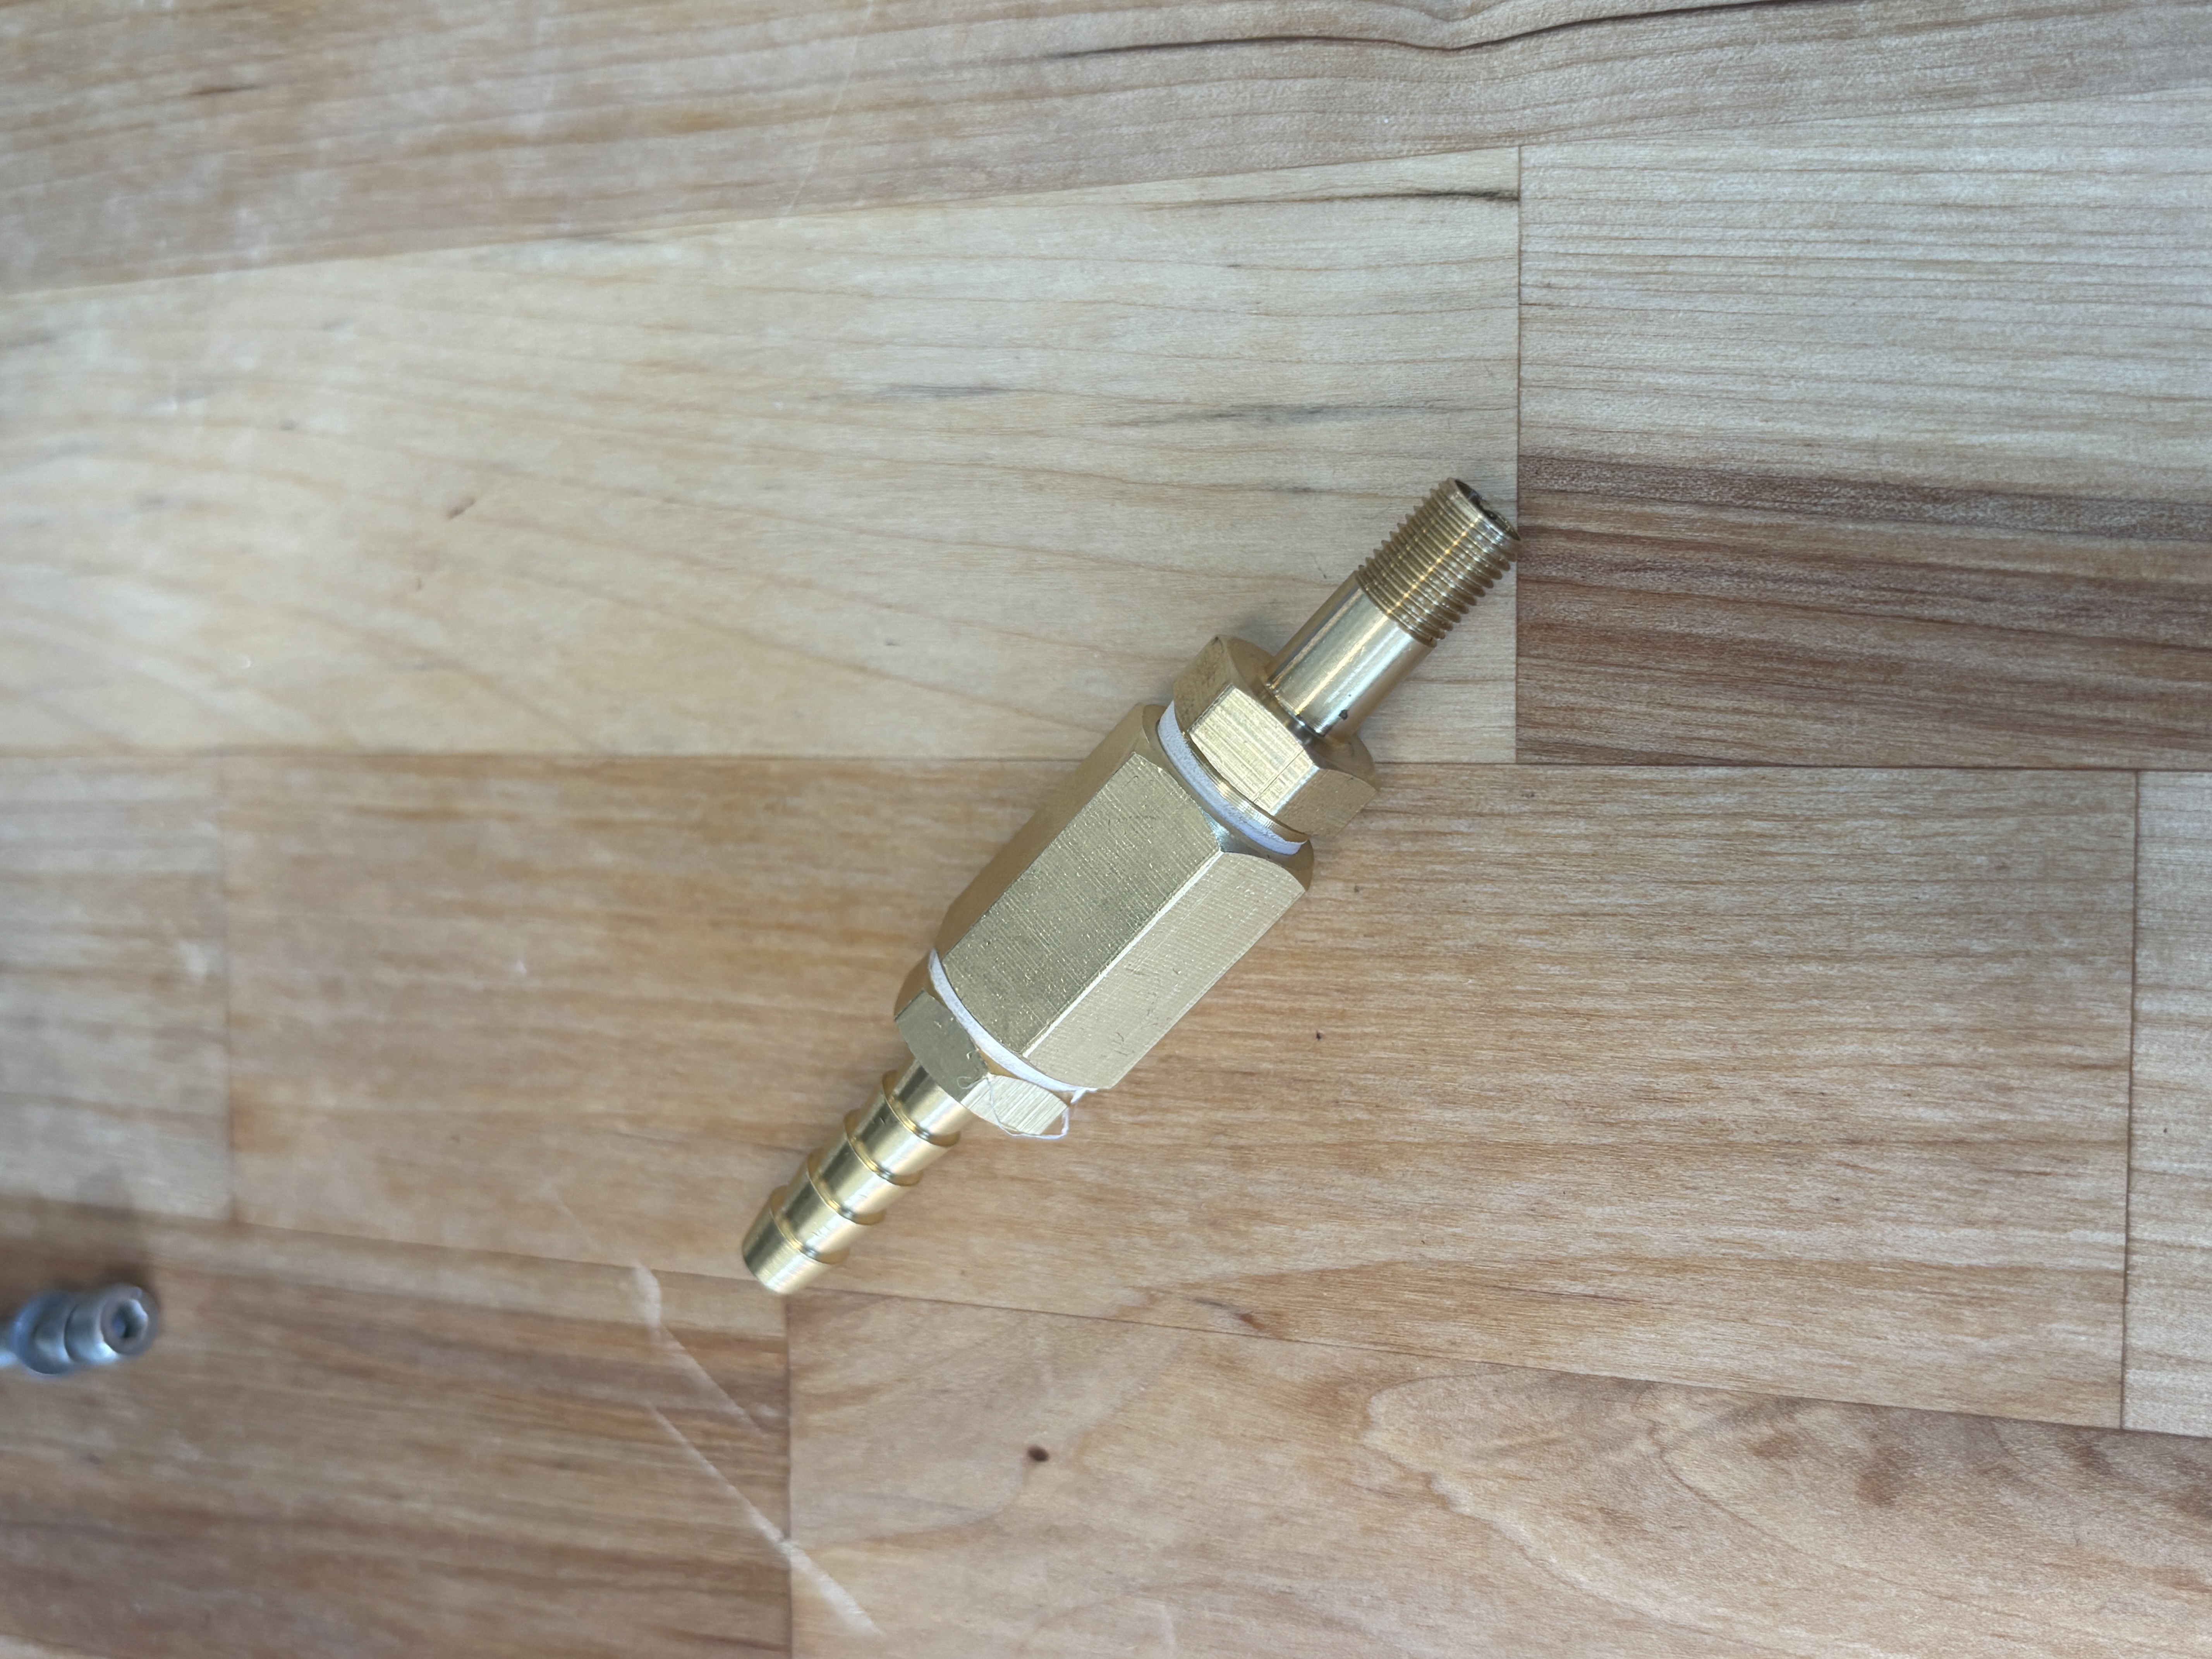
The main idea is easy: get any standard donut air pump, connect a hose to the air pump and the housing of your vehicle, and then spray your vehicle with soapy water. To make this all happen, you will want a quarter inch hose (for Blue Robotics penetrators), a vacuum plug, a schrader to 1/4” barb hose connector, teflon tape, and a bike pump or electric air pump. In my case I had an electric air pump, so I needed to create the schrader to 1/4” barb hose connector. You should order whatever brand or parts you find most suitable to your project. In my case, I ordered Sungator’s ‘1/4” NPT Brass Hose Barb Fittings to 1/4” Barbed Hose Air Fittings’, Godeson’s ‘Schrader Valve with 1/4” Male NPT’, and Sanpaint’s ‘1/4” x 1/4” NPT Coupler, Brass Female Pipe Fitting’ (FNPT). The Godeson part came with a small roll of teflon tape. Our lab already had a 1/4” hose and a vacuum plug , so I was good to go.
Tape on the thread of each of the schrader to NPT part and the NPT to barb hose part. When doing this, ensure you use teflon. You can leave the thread closest to the edge of the part uncovered by tape, as covering it makes it easier for the tape to slip over the airway. Do 4 full rotations of tape around the threads. Then, put the schrader to NPT part into one side of the FNPT part, and put the NPT to barb hose into the other side of the FNPT part. You have the first part.
Now the next part is fairly simple: just put the vacuum tube on the vacuum plug, put the other end of the tube on the barb hose, and you can connect the air pump to the schrader valve. If you did everything correctly, you should be able to pump air through the hose without issue. If needed, you could also use a hose clamp to help secure the hose to the barb hose end.
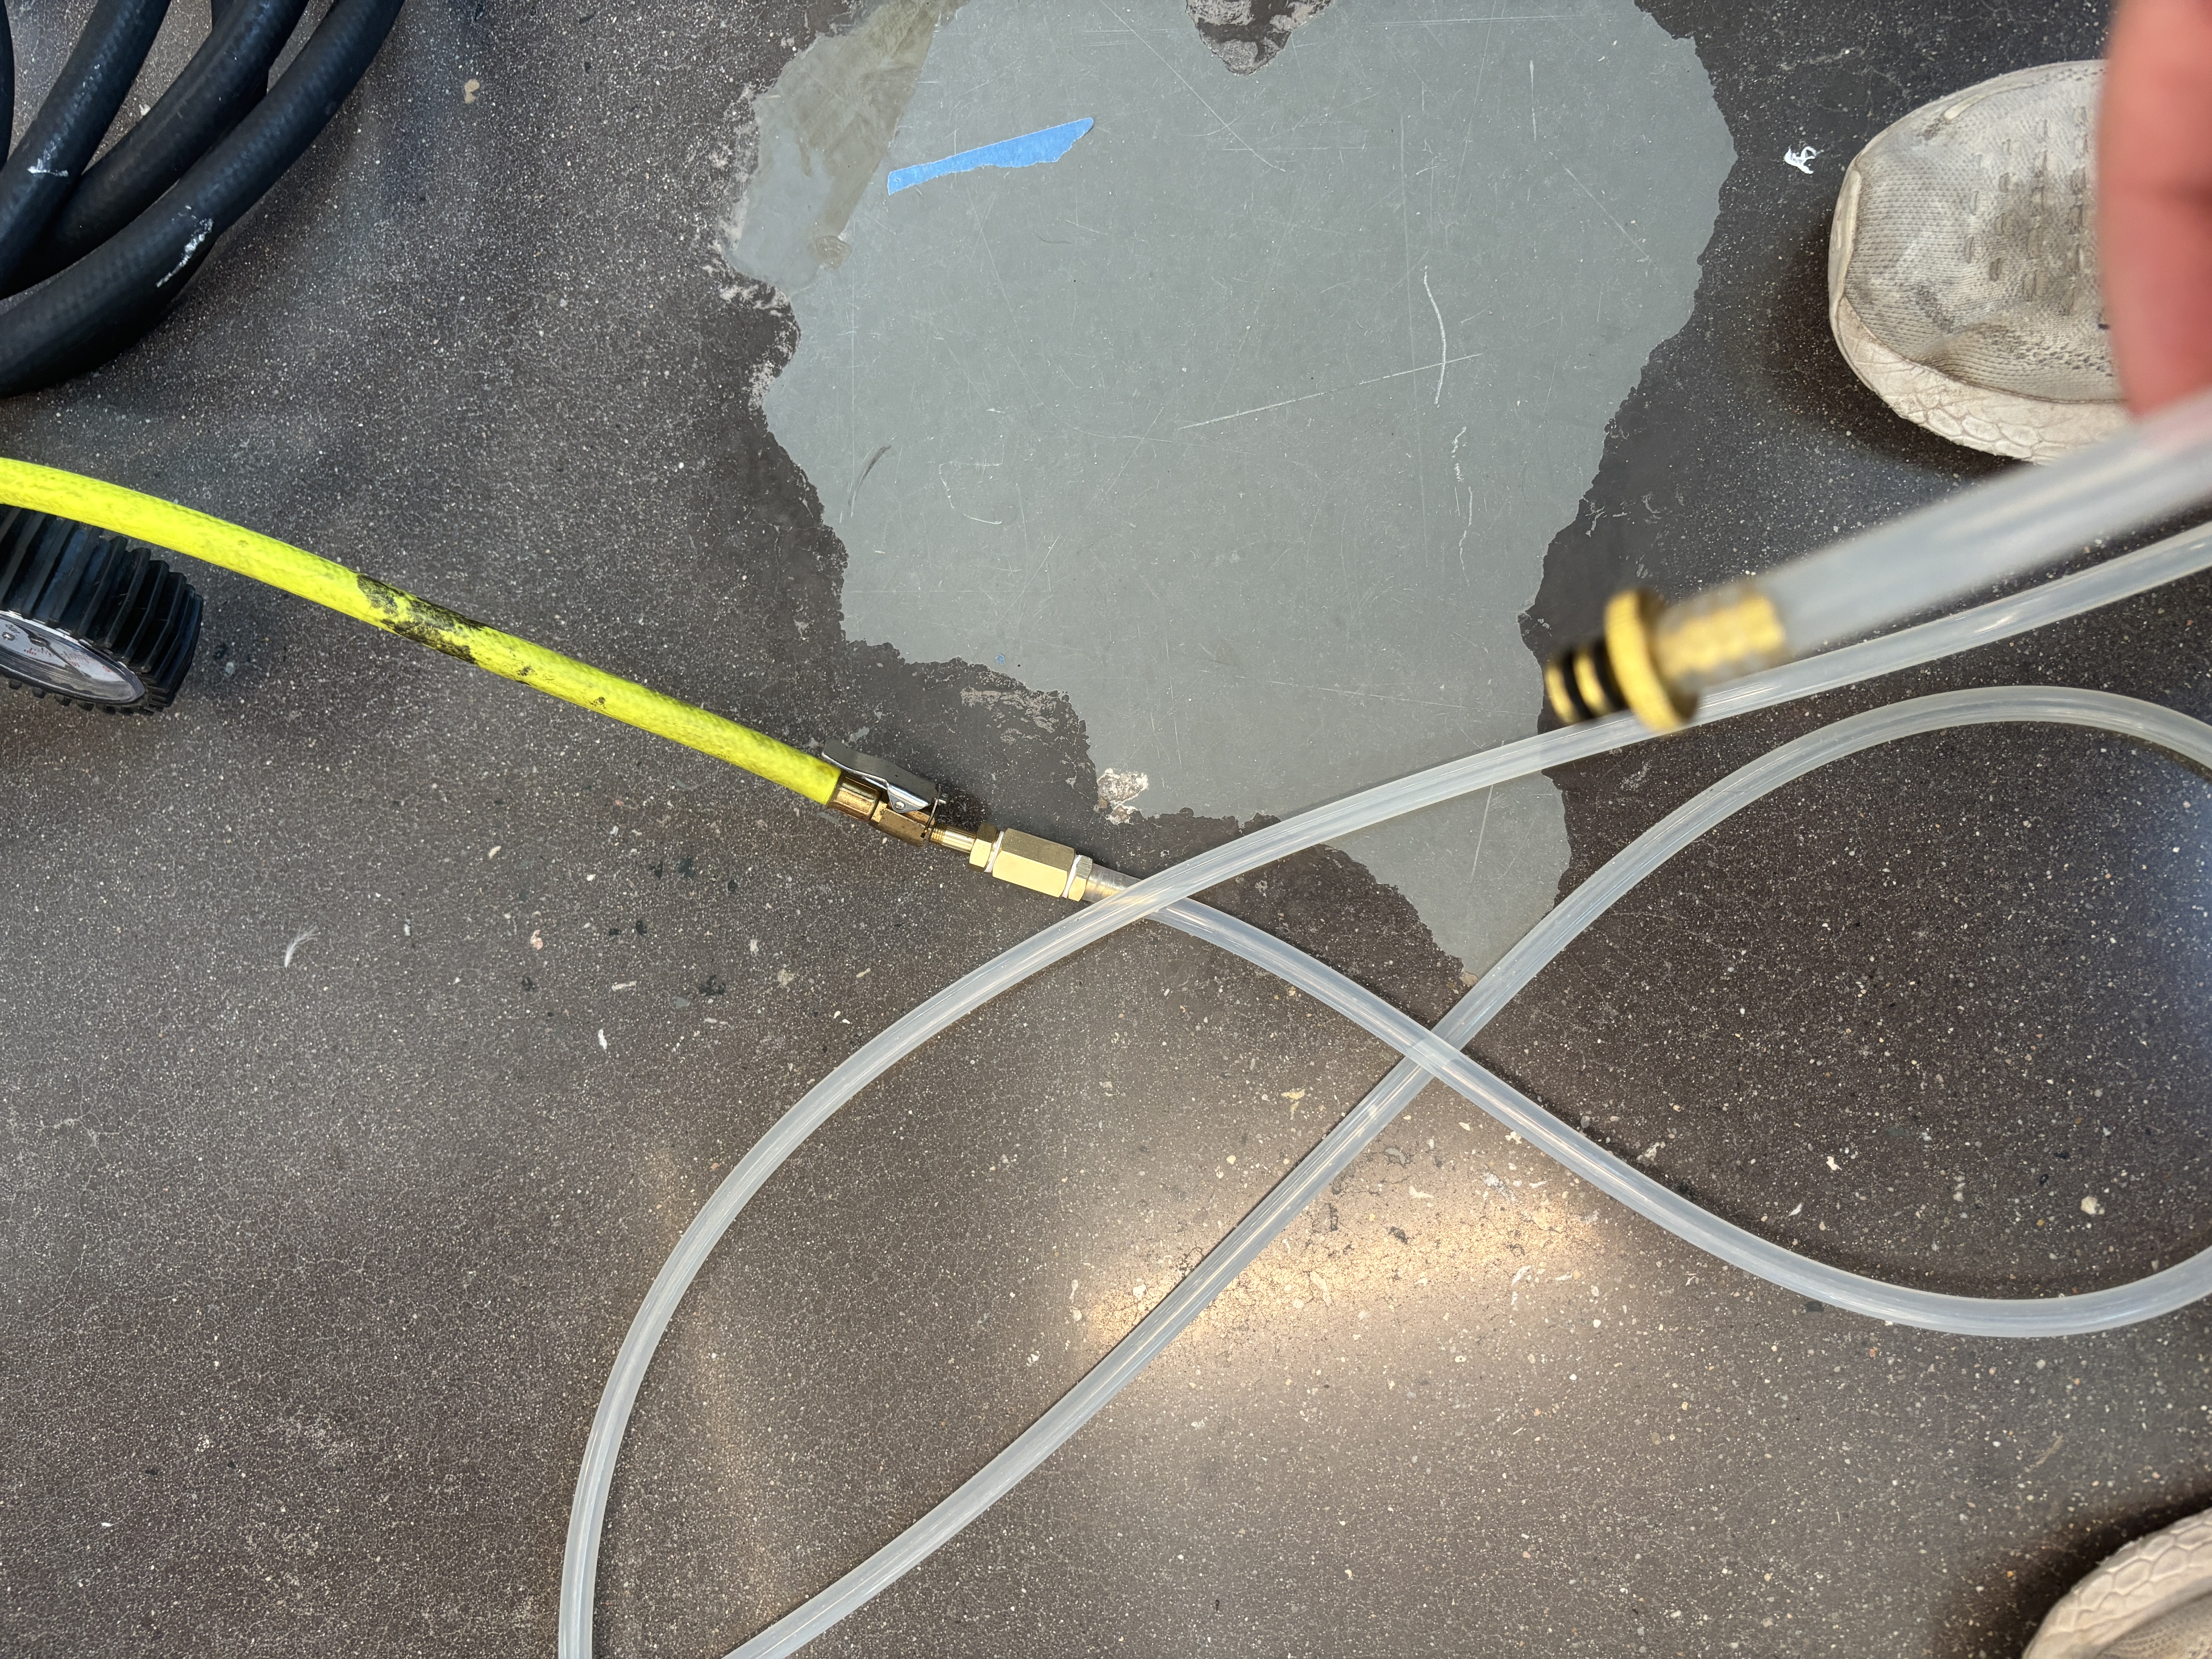
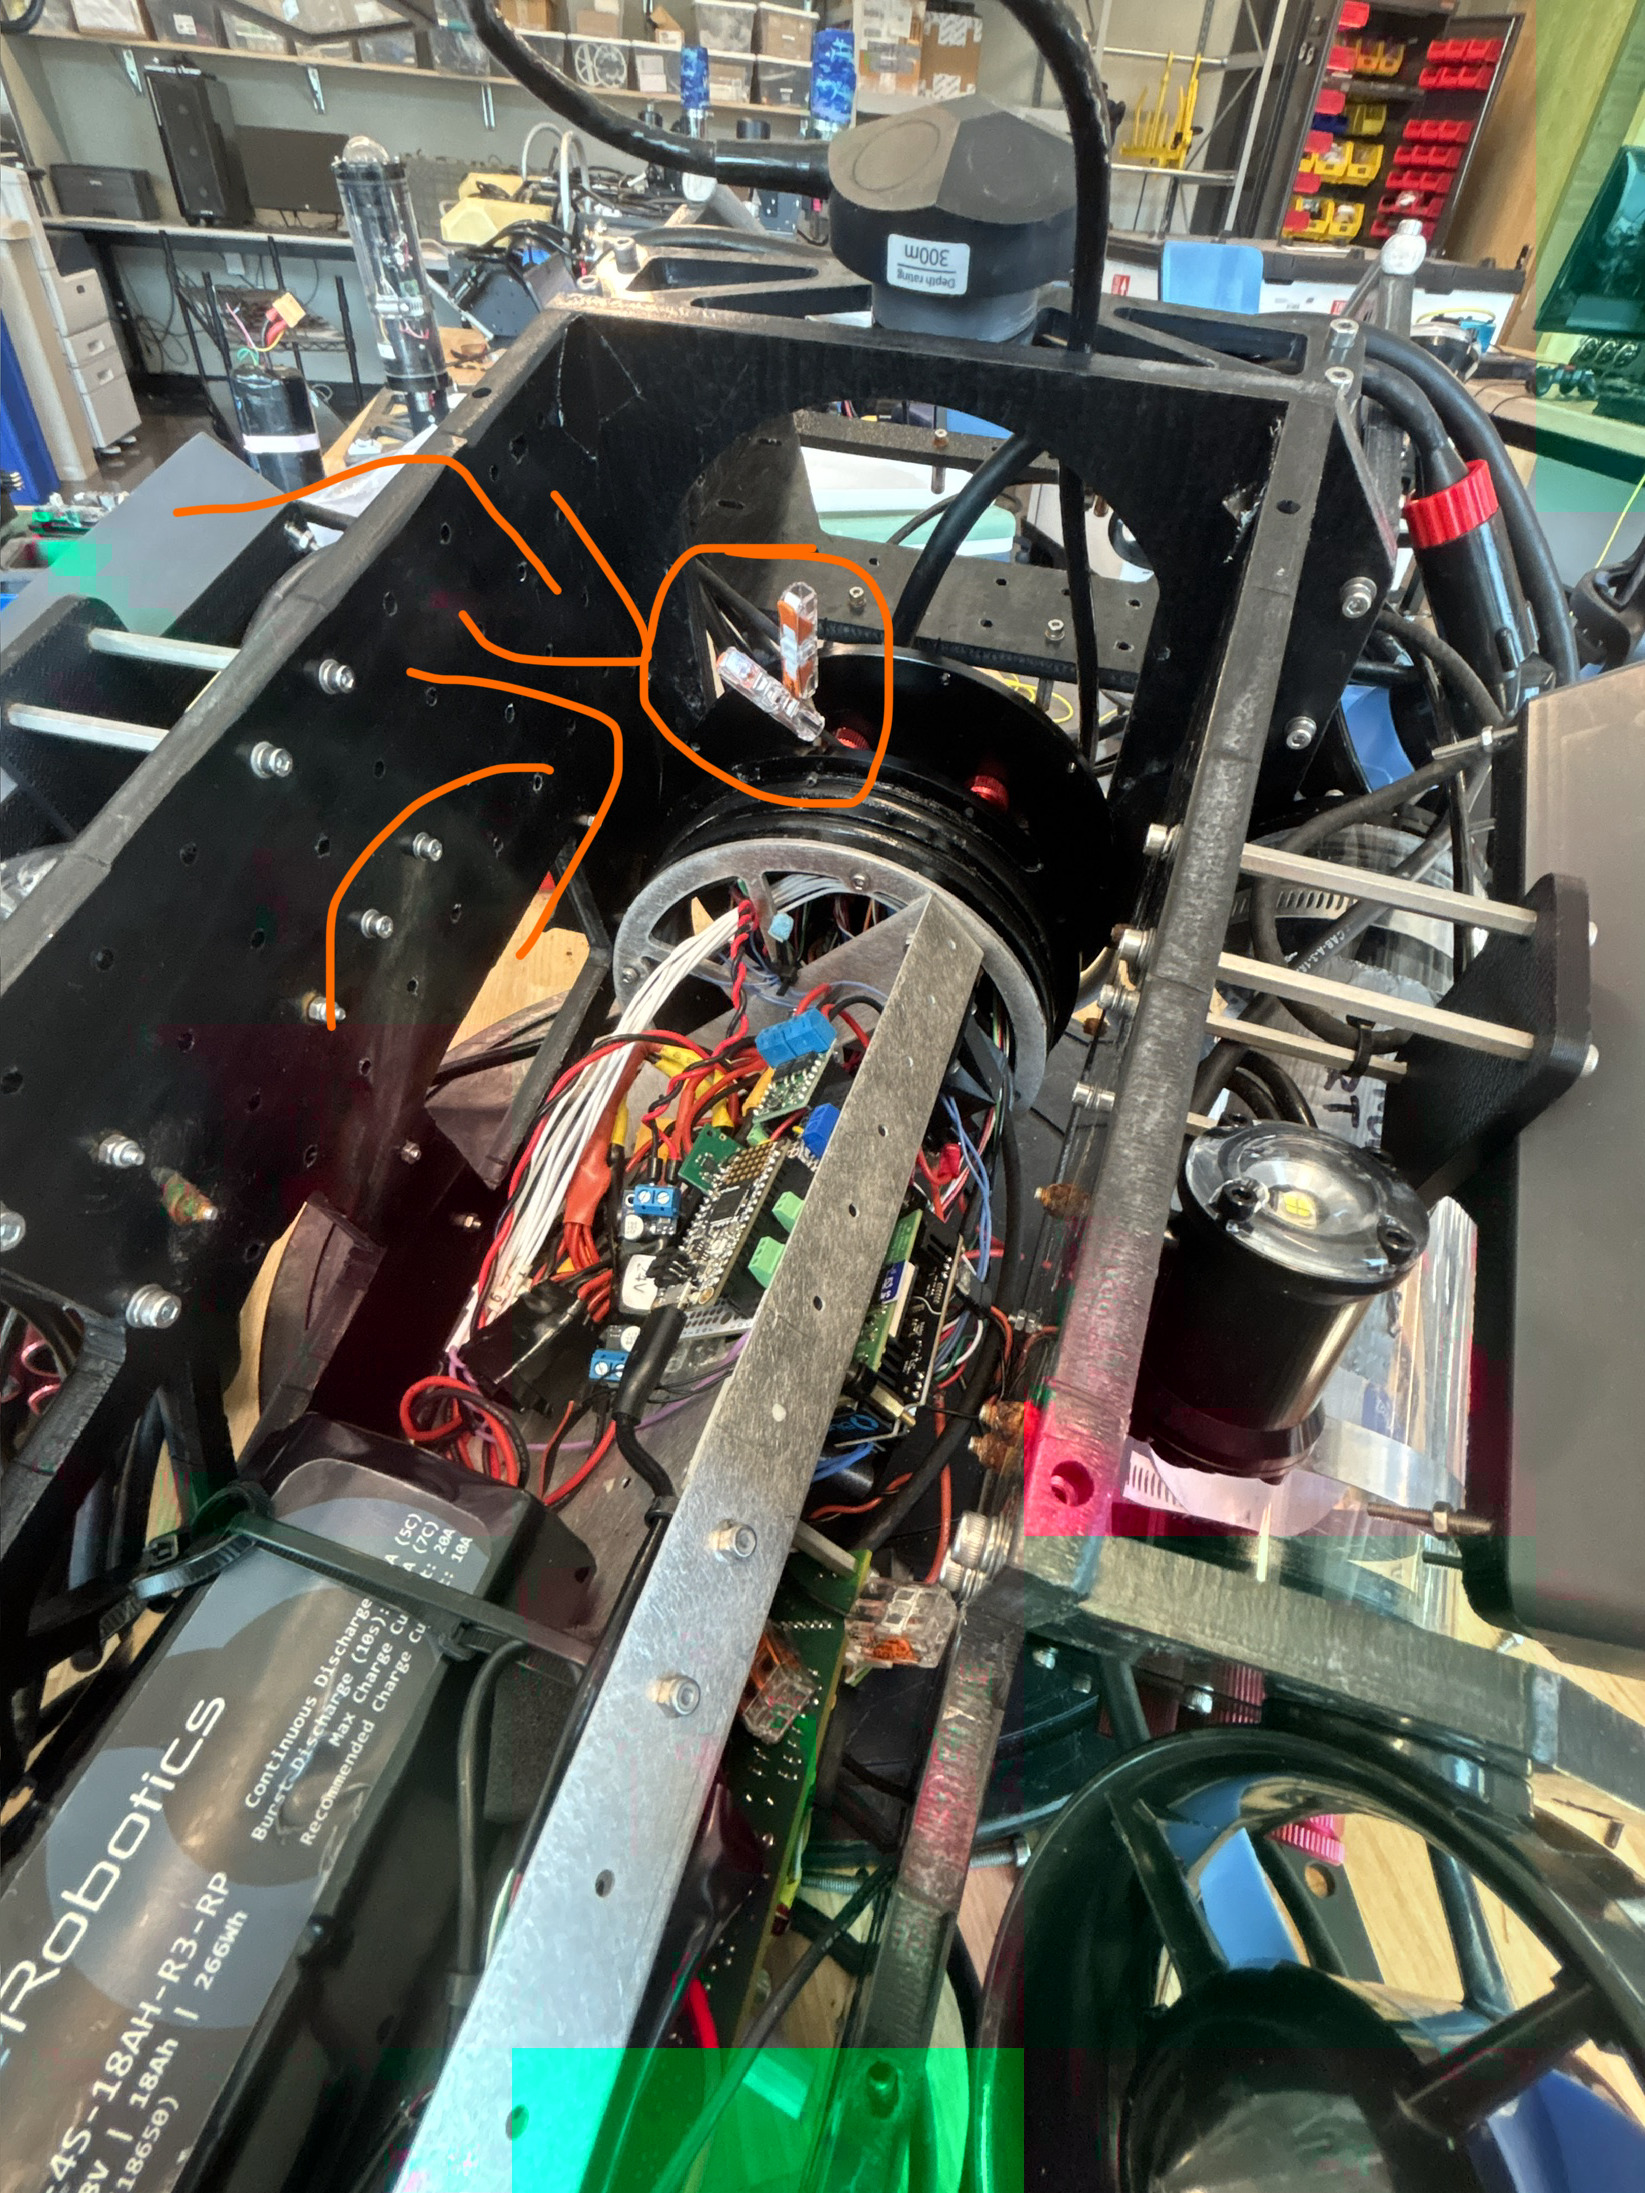
Now get yourself some soapy water and a spray bottle. Seal up your vehicle, put your end caps in, and pull up a pressure monitor. You may also want rachet straps to hold the end caps in; without them your end caps may pop off when put under pressure. I am not covering the pressure sensor in too much detail as most readers should have access to one already; they typically are included with your underwater robot setup. If you do not have a pressure sensor, here are a few options. 1) If you buy an Arduino board and a pressure sensor, you can place the board inside your housing, connect to to WiFi, and see the pressure. 2) Another option is wiring your pressure sensor of choice through the end cap. Later on in this blog I will show how you can do this wiring and make the seal watertight.
After spraying your penetrators and any other suspicious parts, you can find the leak by looking for bubbles. Here is a short video showing my leaky penetrator:
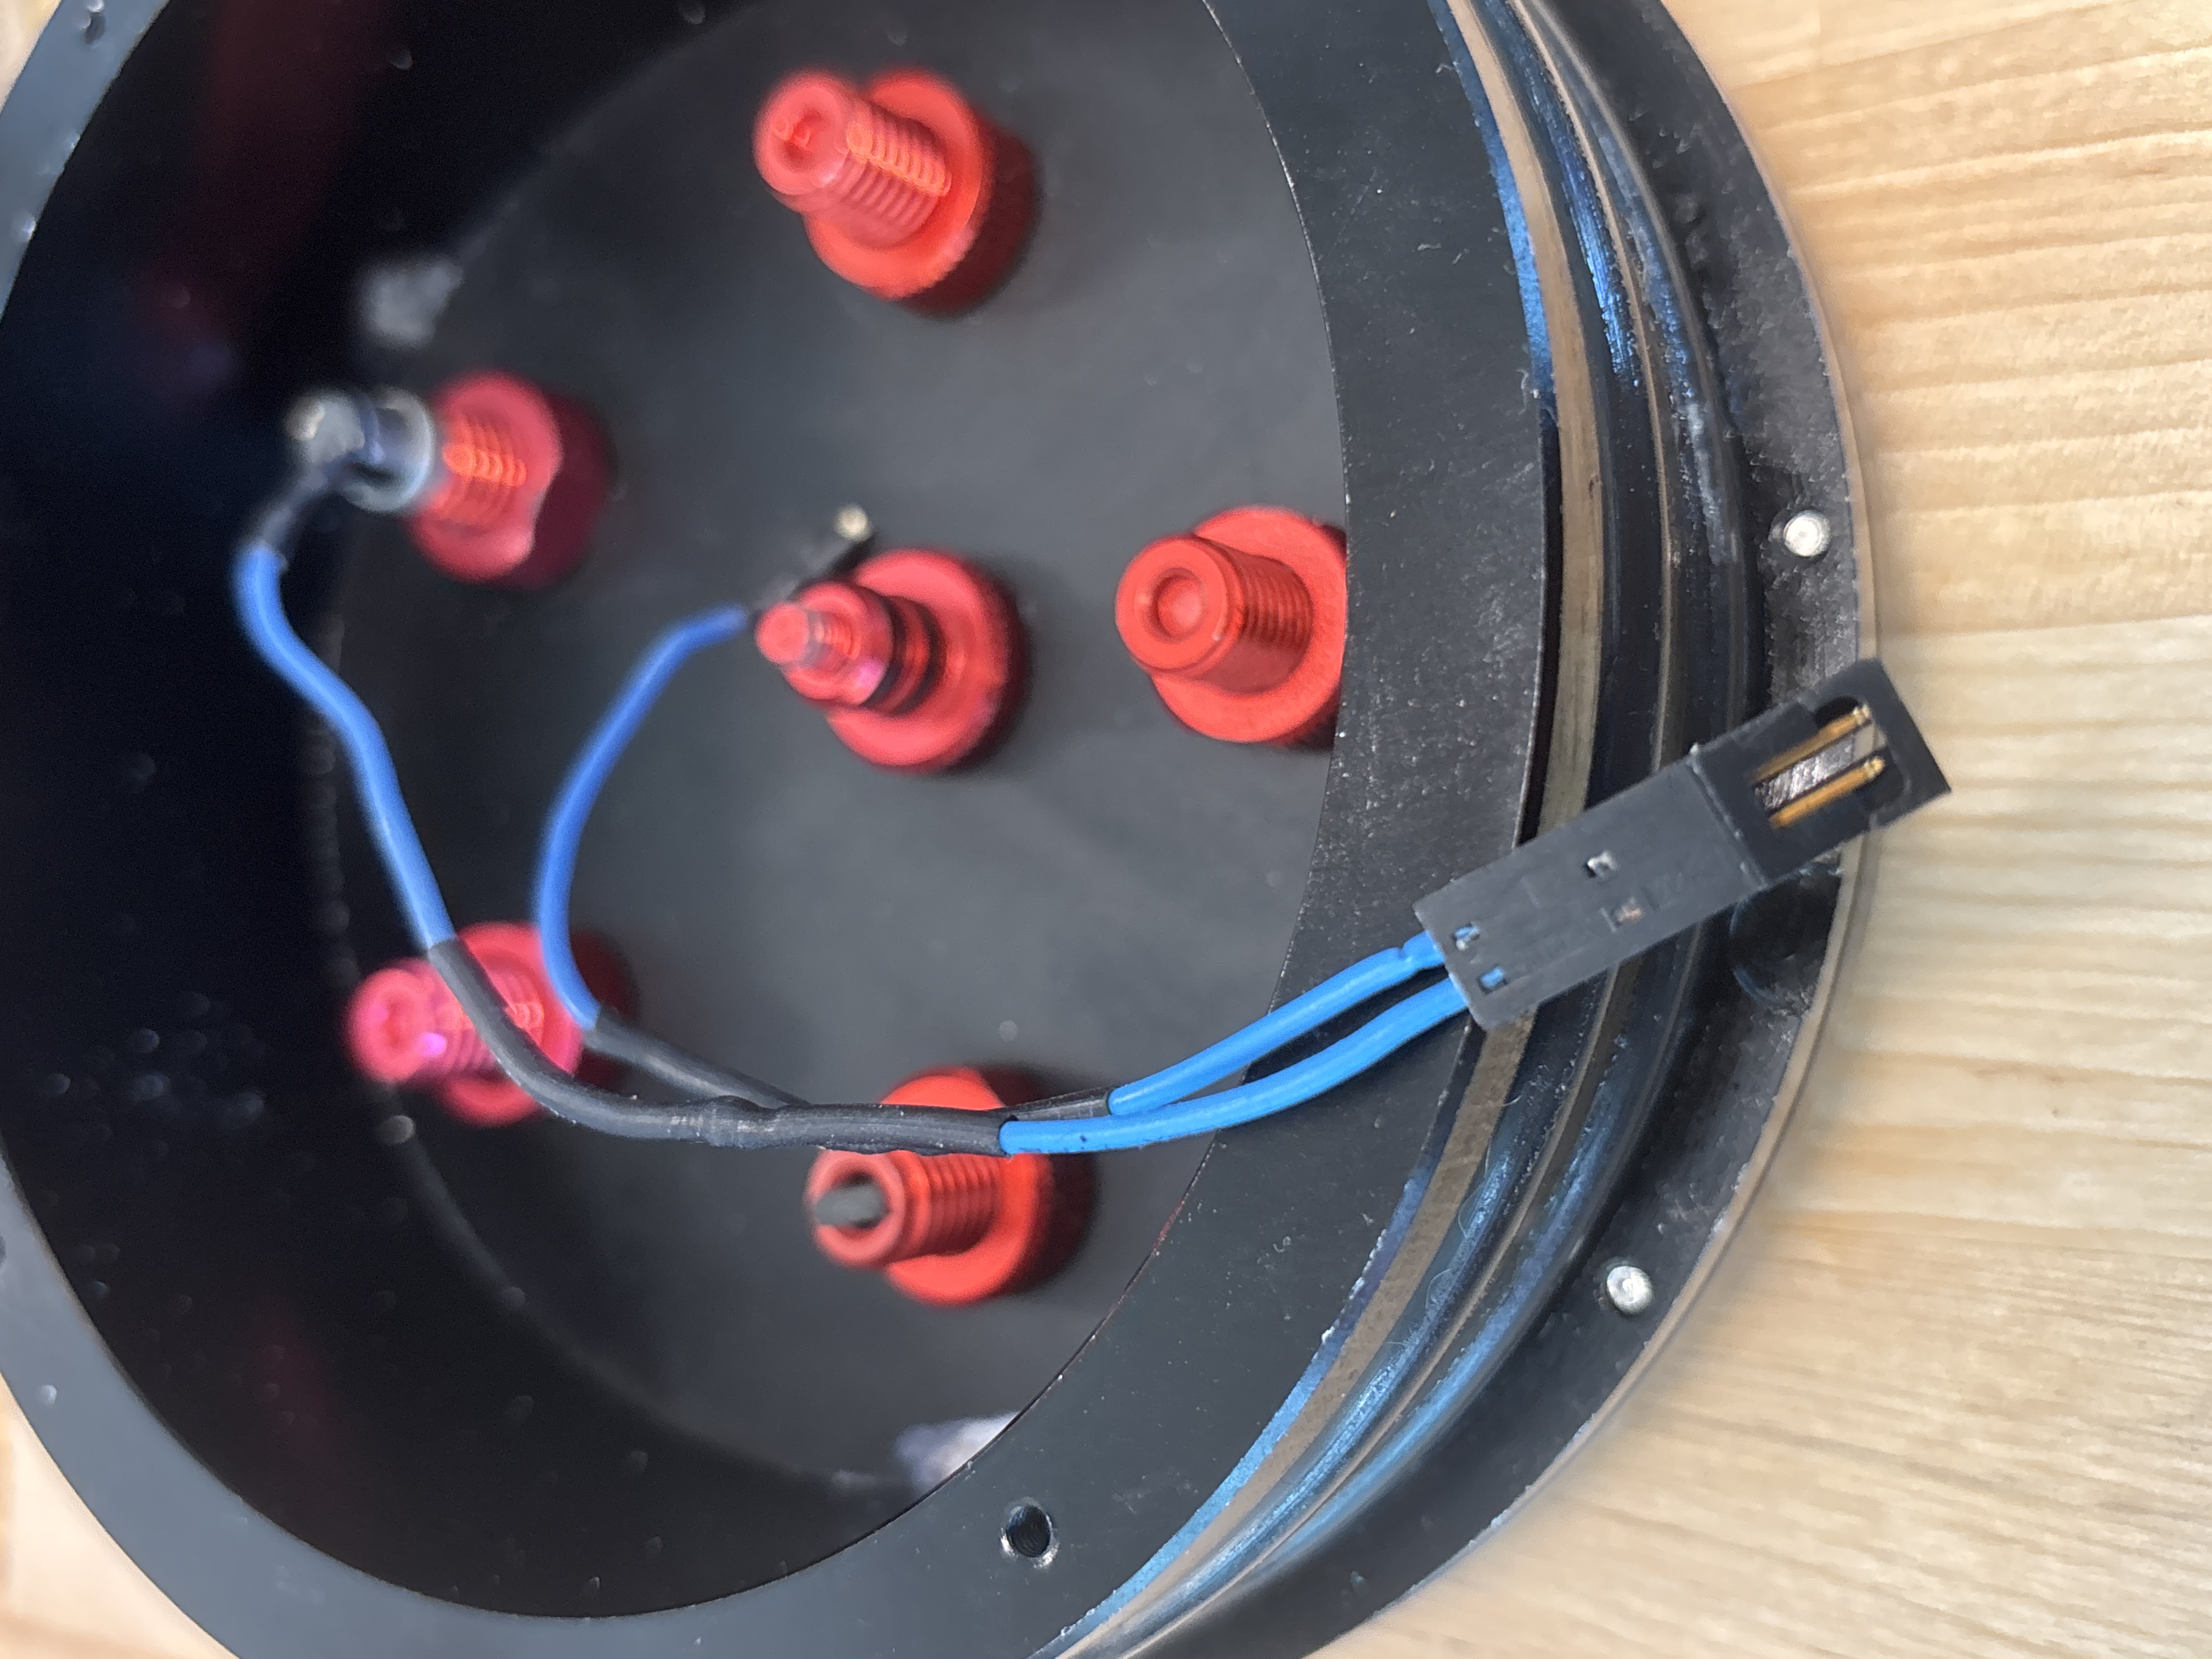
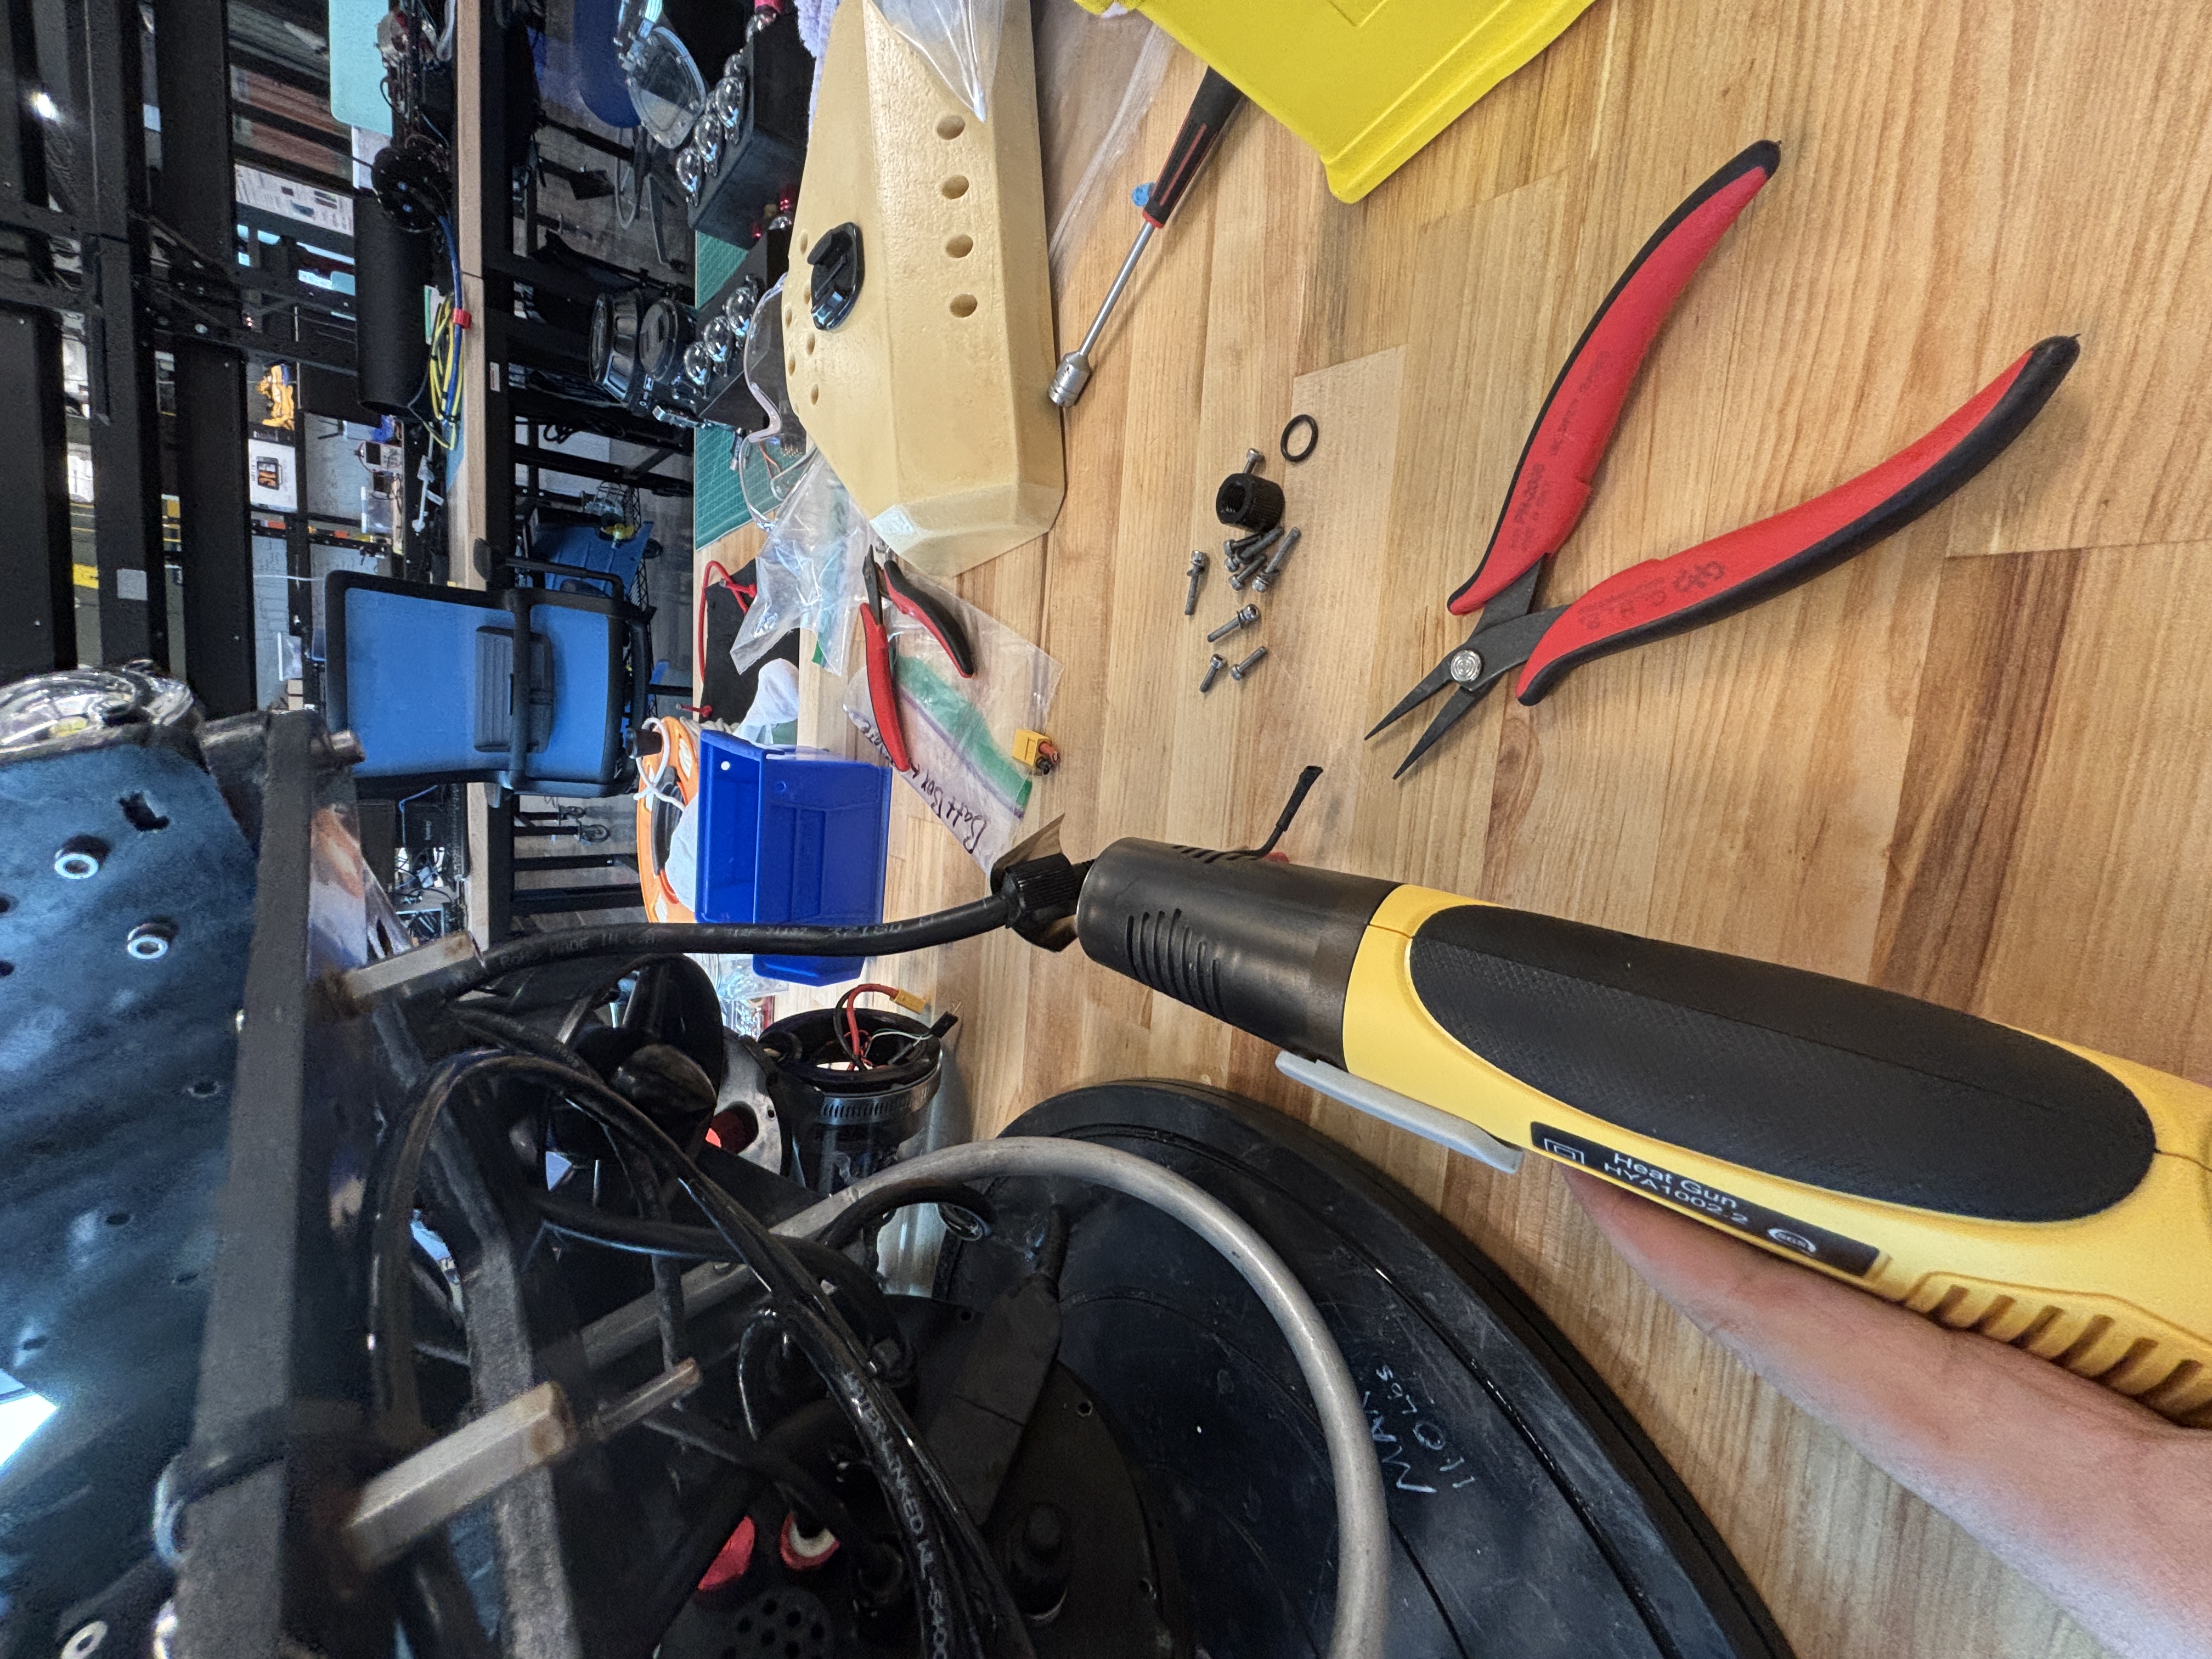
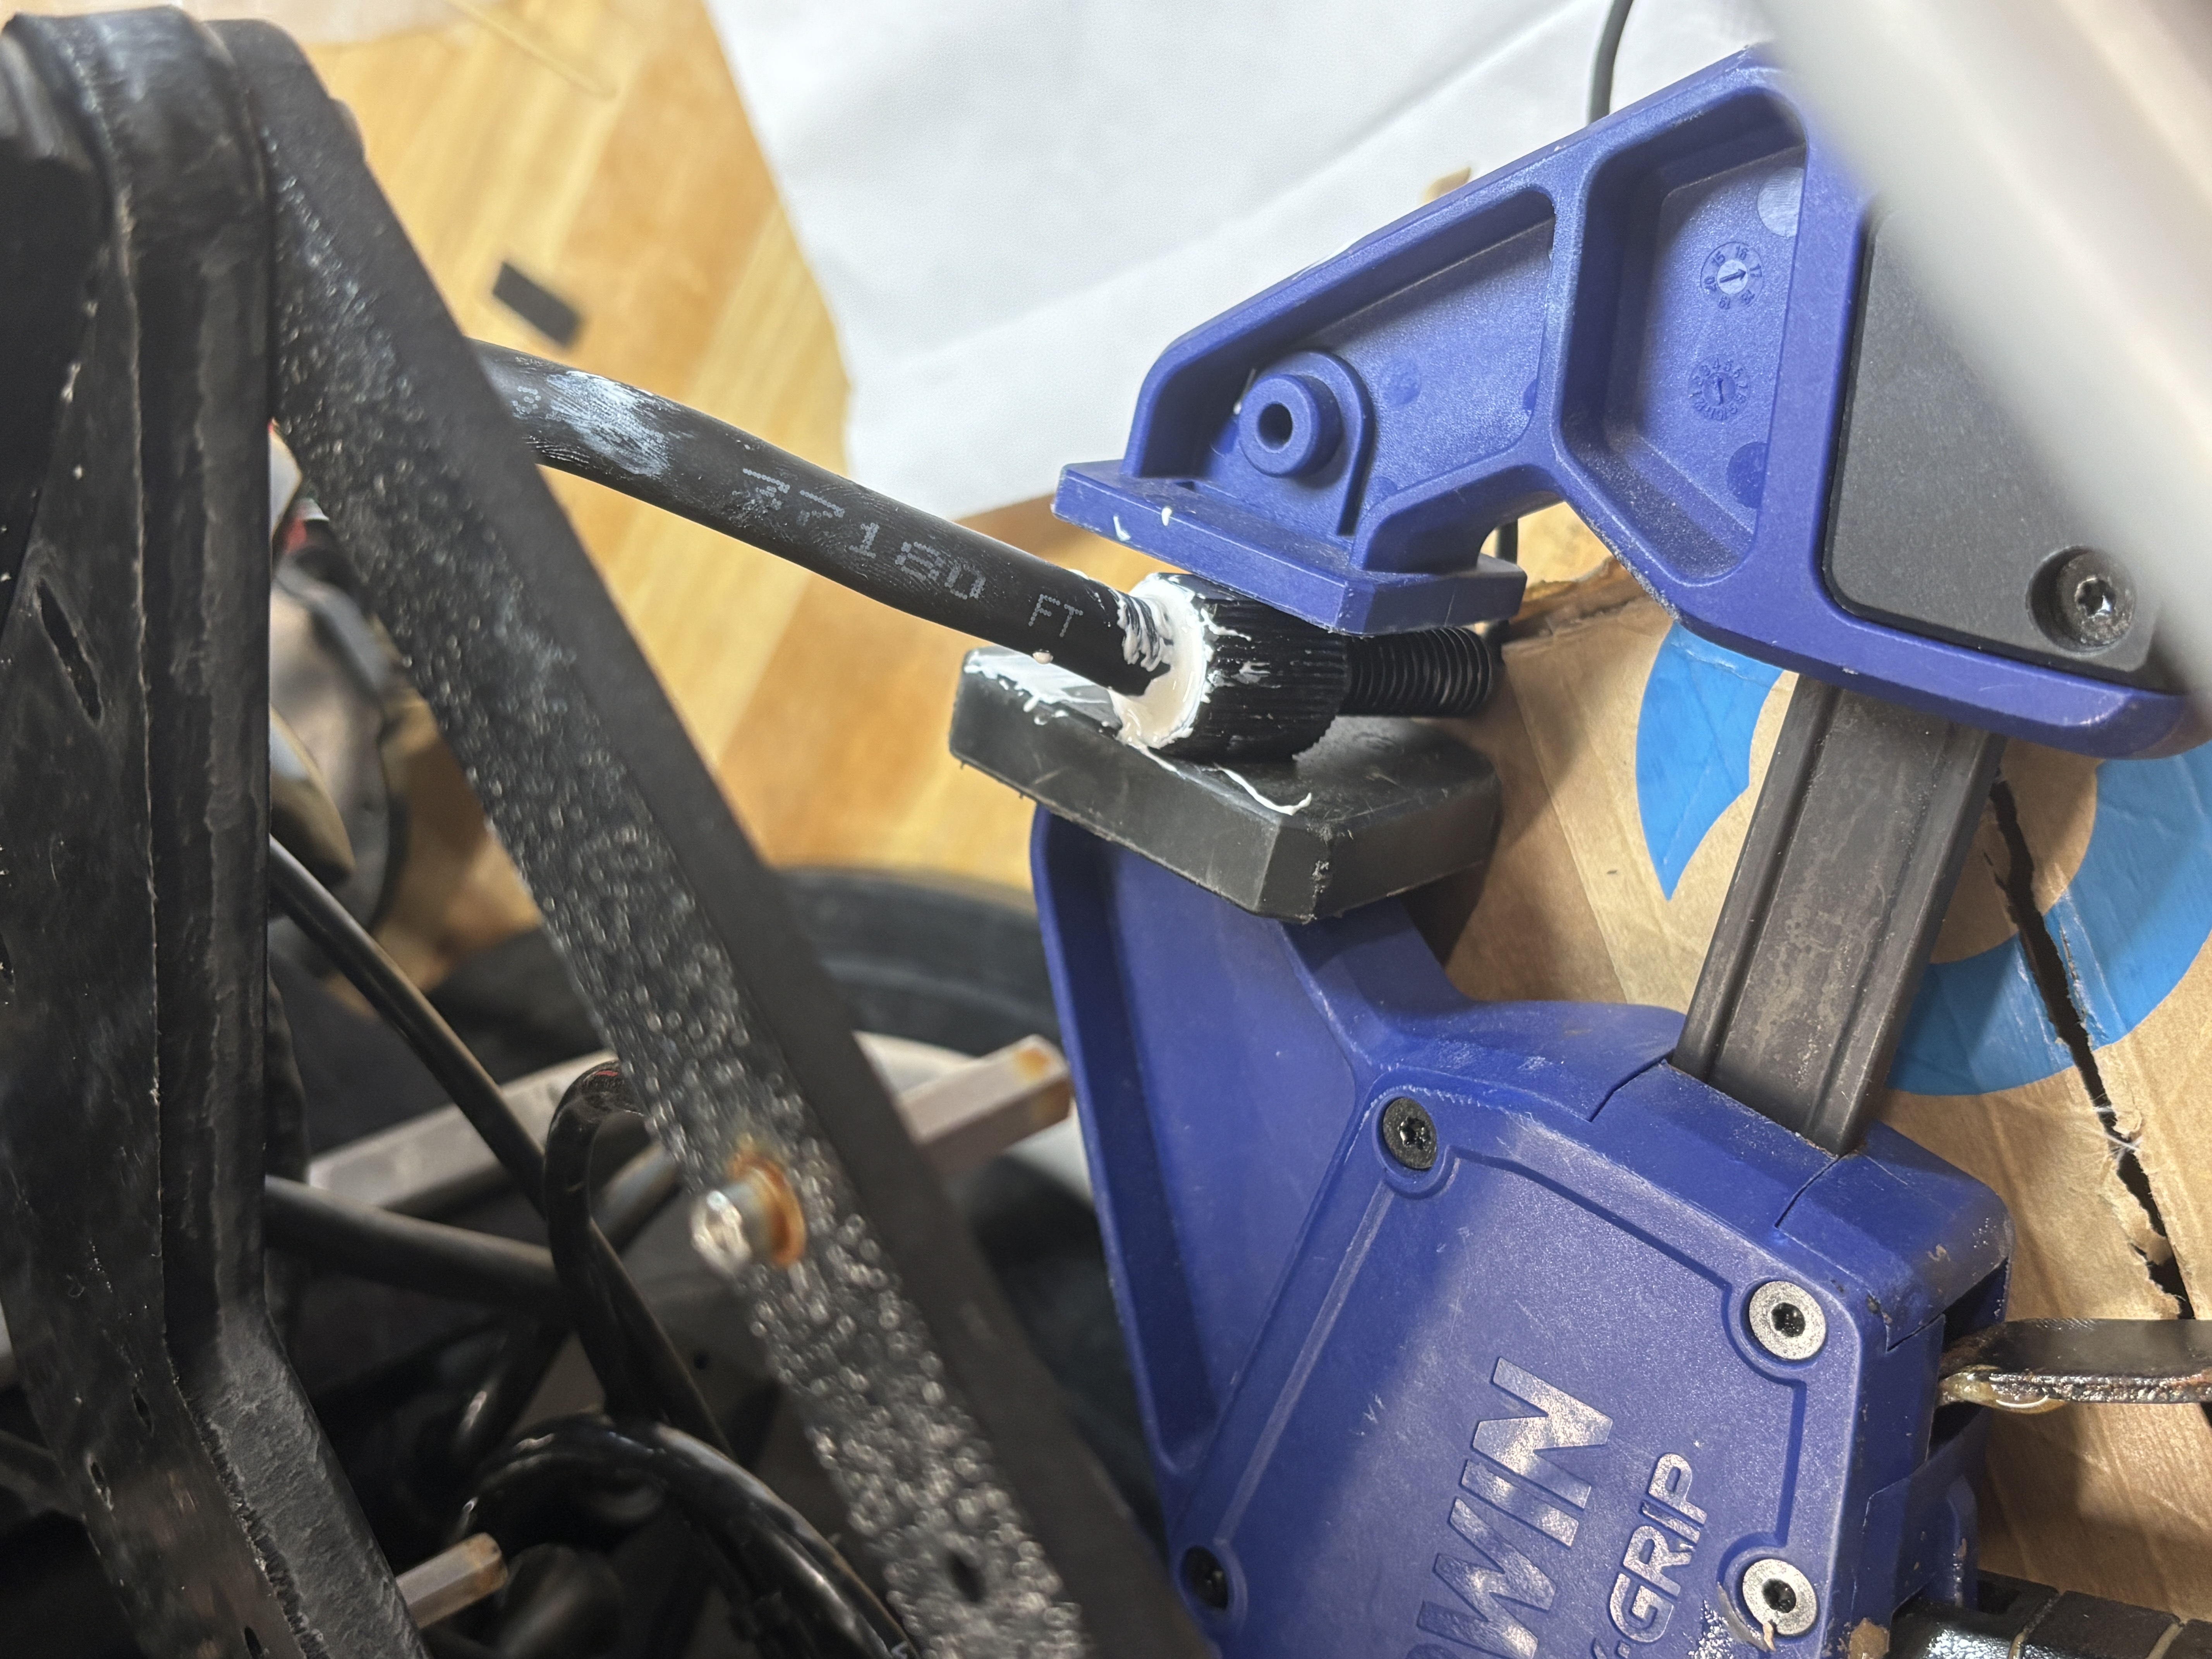
With the leaky penetrator identified, we had to take apart the vehicle to get at either side of the end cap. The goal is to loosen the nut holding the penetrator in place and then pull out the penetrator. This can take some time depending on the complexity of your vehicle. Once you pull out the penetrator, the old epoxy will still be holding the wiring in place. To remove this epoxy, use heat to degrade the epoxy and some sort of sharp tool (a screwdriver, pick) to dig out the epoxy. In my case I used a heat gun. I would apply heat for about 5-7 minutes to the bottom of the o-ring (see image) and then use my sharp tool to probe the epoxy. After repeating this process multiple times, the epoxy became soft. At this point you can start digging it all out. You may have to reheat multiple times to get all the epoxy out. Once you get it all out, you can slide the wiring out of the penetrator, and you are now ready to fix it.
I decided to reuse the old penetrator because the part looked fine. However, note that in this blog I am using an older version of the Blue Robotics penetrators. They now offer the WetLink Penetrators. These newer ones provide higher reliability and better performance at depth, and they are easier to install. If you are working with those, Blue Robotics has a great video on how to install them. Likewise, for the older penetrators I am using, Blue Robotics has 2 (video 1, video 2) videos that I found helpful. I did notice discrepancies between both videos, so I am representing them here to stich them together. Watch both of them for further details. The most essential items to have are: epoxy, acetone prep wipes, syringes, a makeshift jig, paper towels, and cotton tipped swabs. Most of these items can be obtained by buying Blue Robotics’s Potting Kit and their Loctite Epoxy.
If needed, first cut the wire insulation in order to get access to the wires. Then, use acetone wipes to clean the remaining insulation, which will help the epoxy bind. If you have an epoxy applicator, you should fill it with epoxy, and push a little bit out onto a paper towel. This helps eliminate any excess air that is within the epoxy package before filing up the syringes. Personally, I did not have an applicator, so I simply filled the syringes directly. Ideally you should fill the syringes horizontally in order to prevent air bubbles from forming. Then, slide the penetrator up the wire to the start of the insulation. You can use super glue at the end of the insulation to help keep the penetrator in place. Also use your makeshift jig to hold the penetrator while you ready the epoxy. At last, you fill up the top of the penetrator with epoxy. You can wait 3 hours before getting the other side of the penetrator, or you can use a heat gun to help it cure faster. For a full cure, you should wait 24 hours.
After waiting for your epoxy to cure, you should reinstall everything. Put the penetrator’s o-ring on, slide the wiring back through the end cap, and use the penetrator’s nut to hold it in place. Further instructions can be found on the WetLink Penetrator Assembly page.
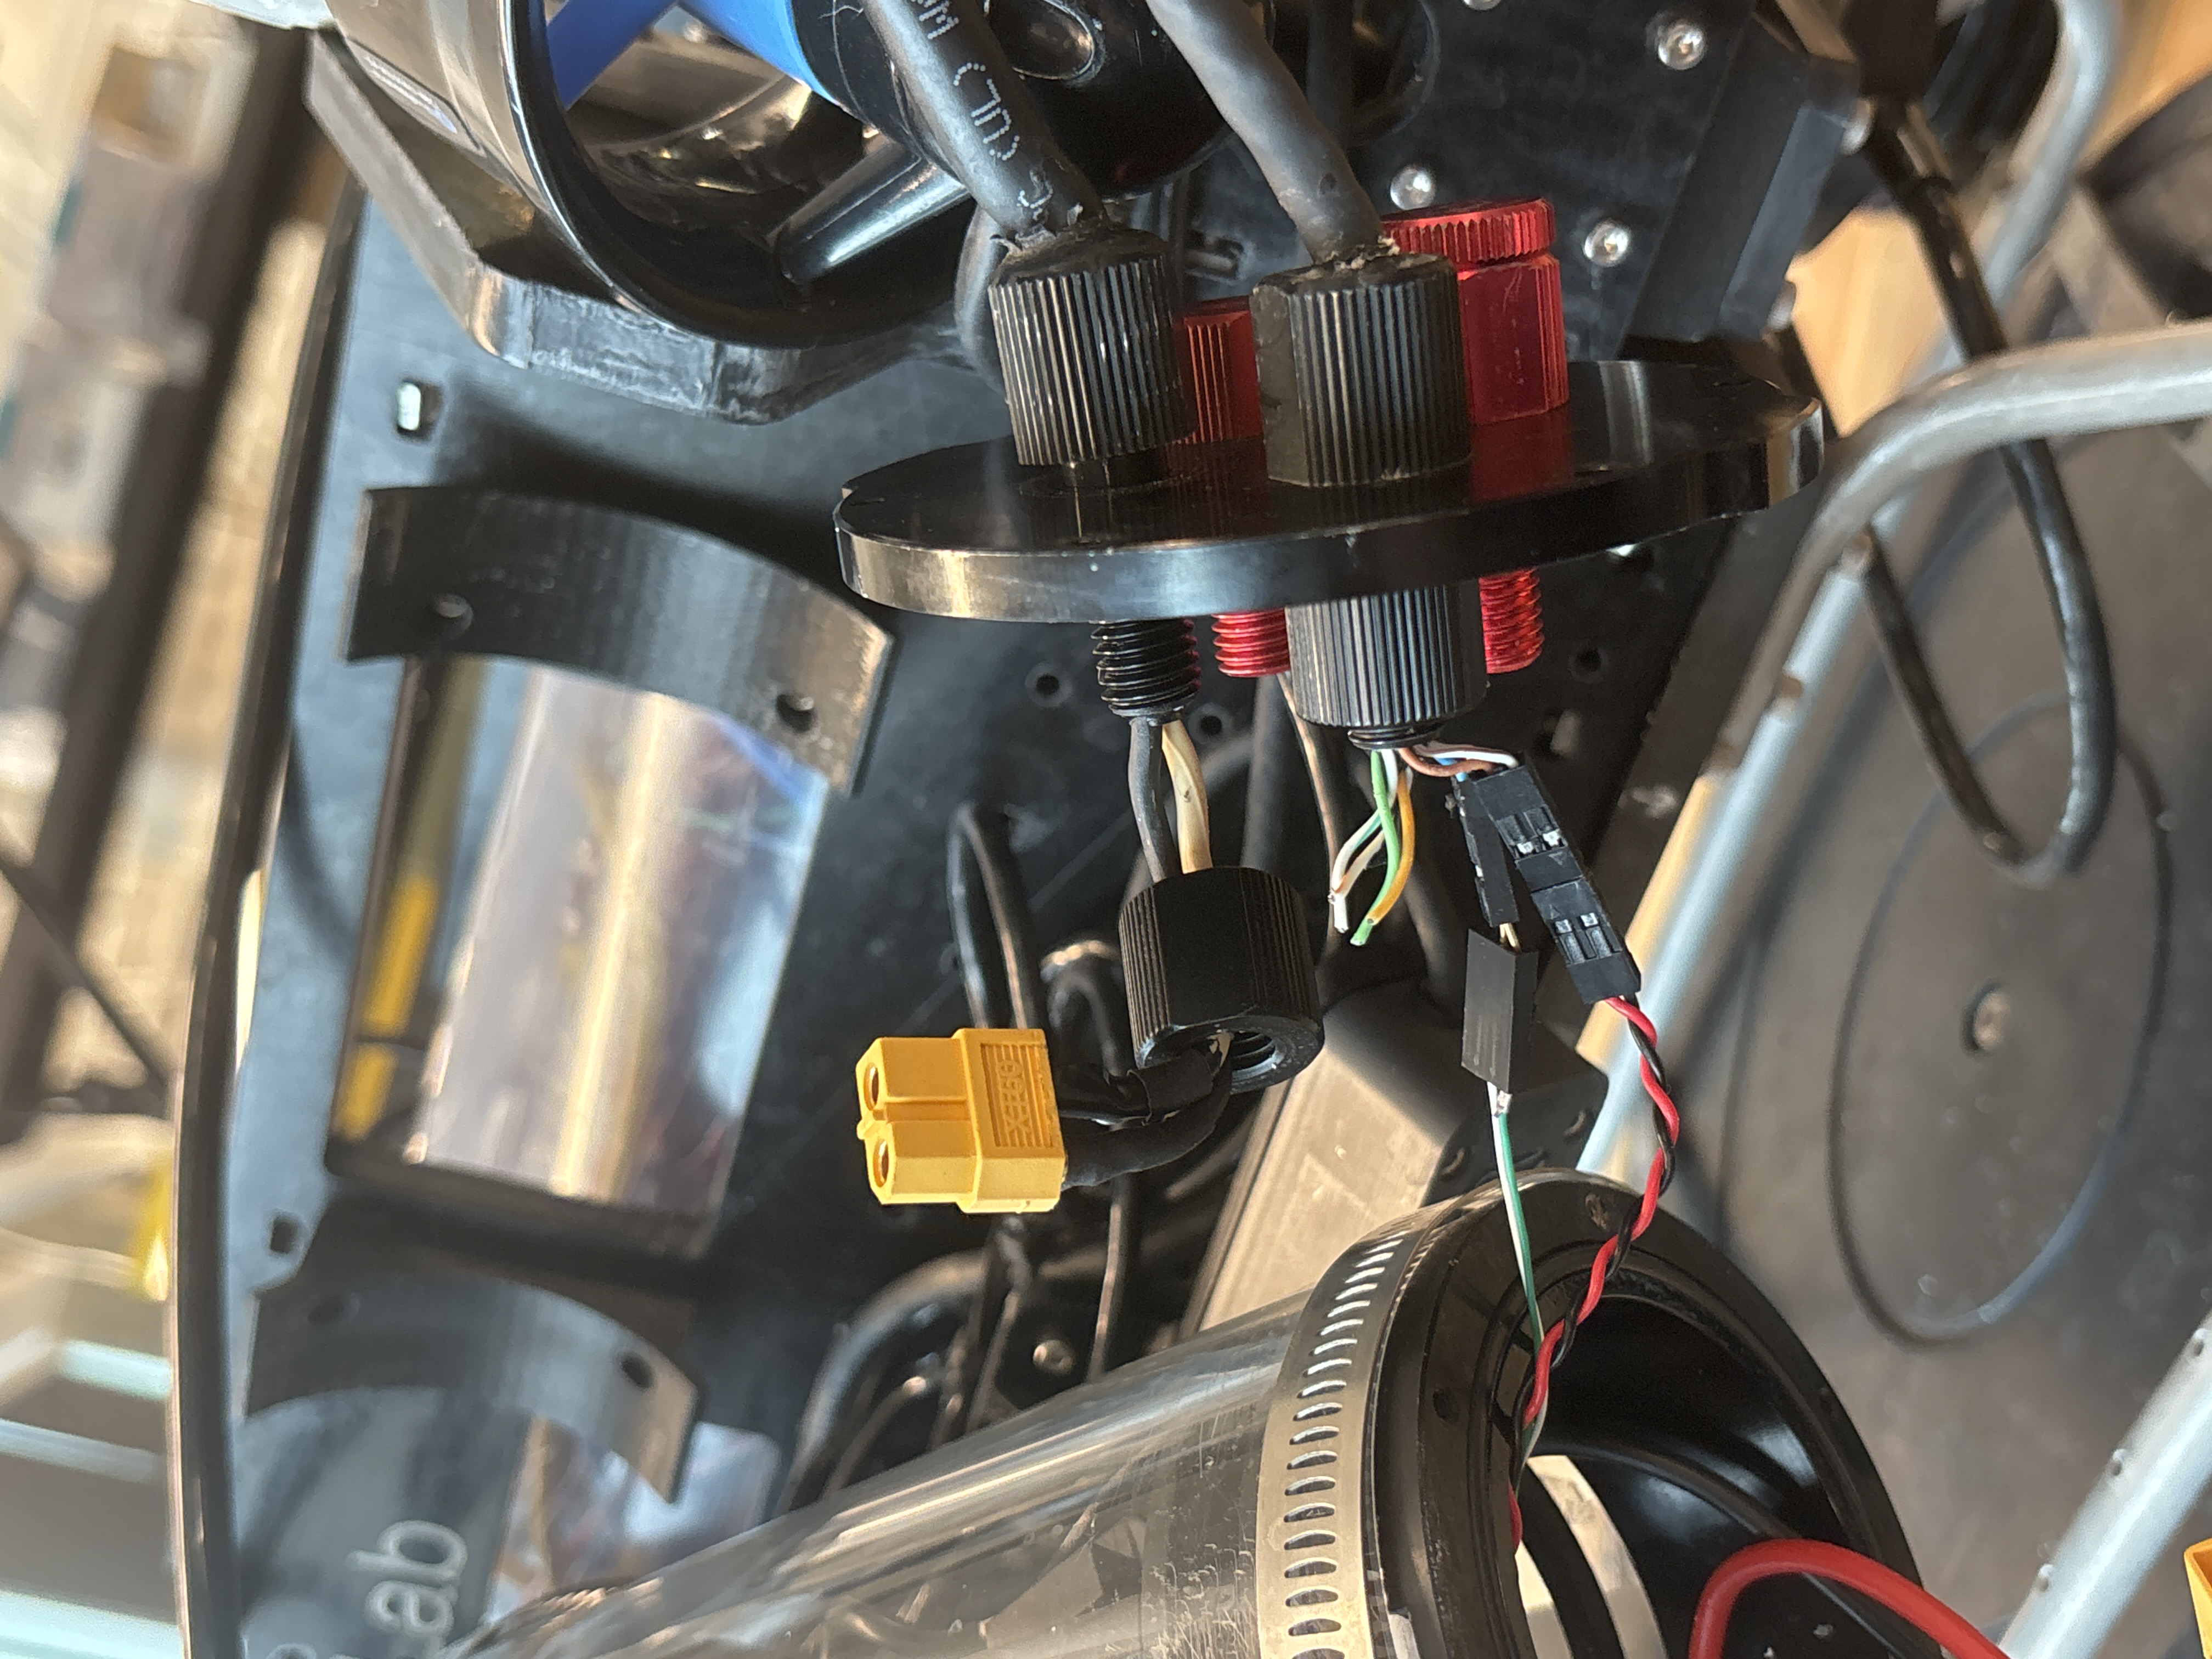
Now, some of you may have needed to cut some wiring in order to pull the penetrator out. In my case, I had to cut off a XT60 connector.
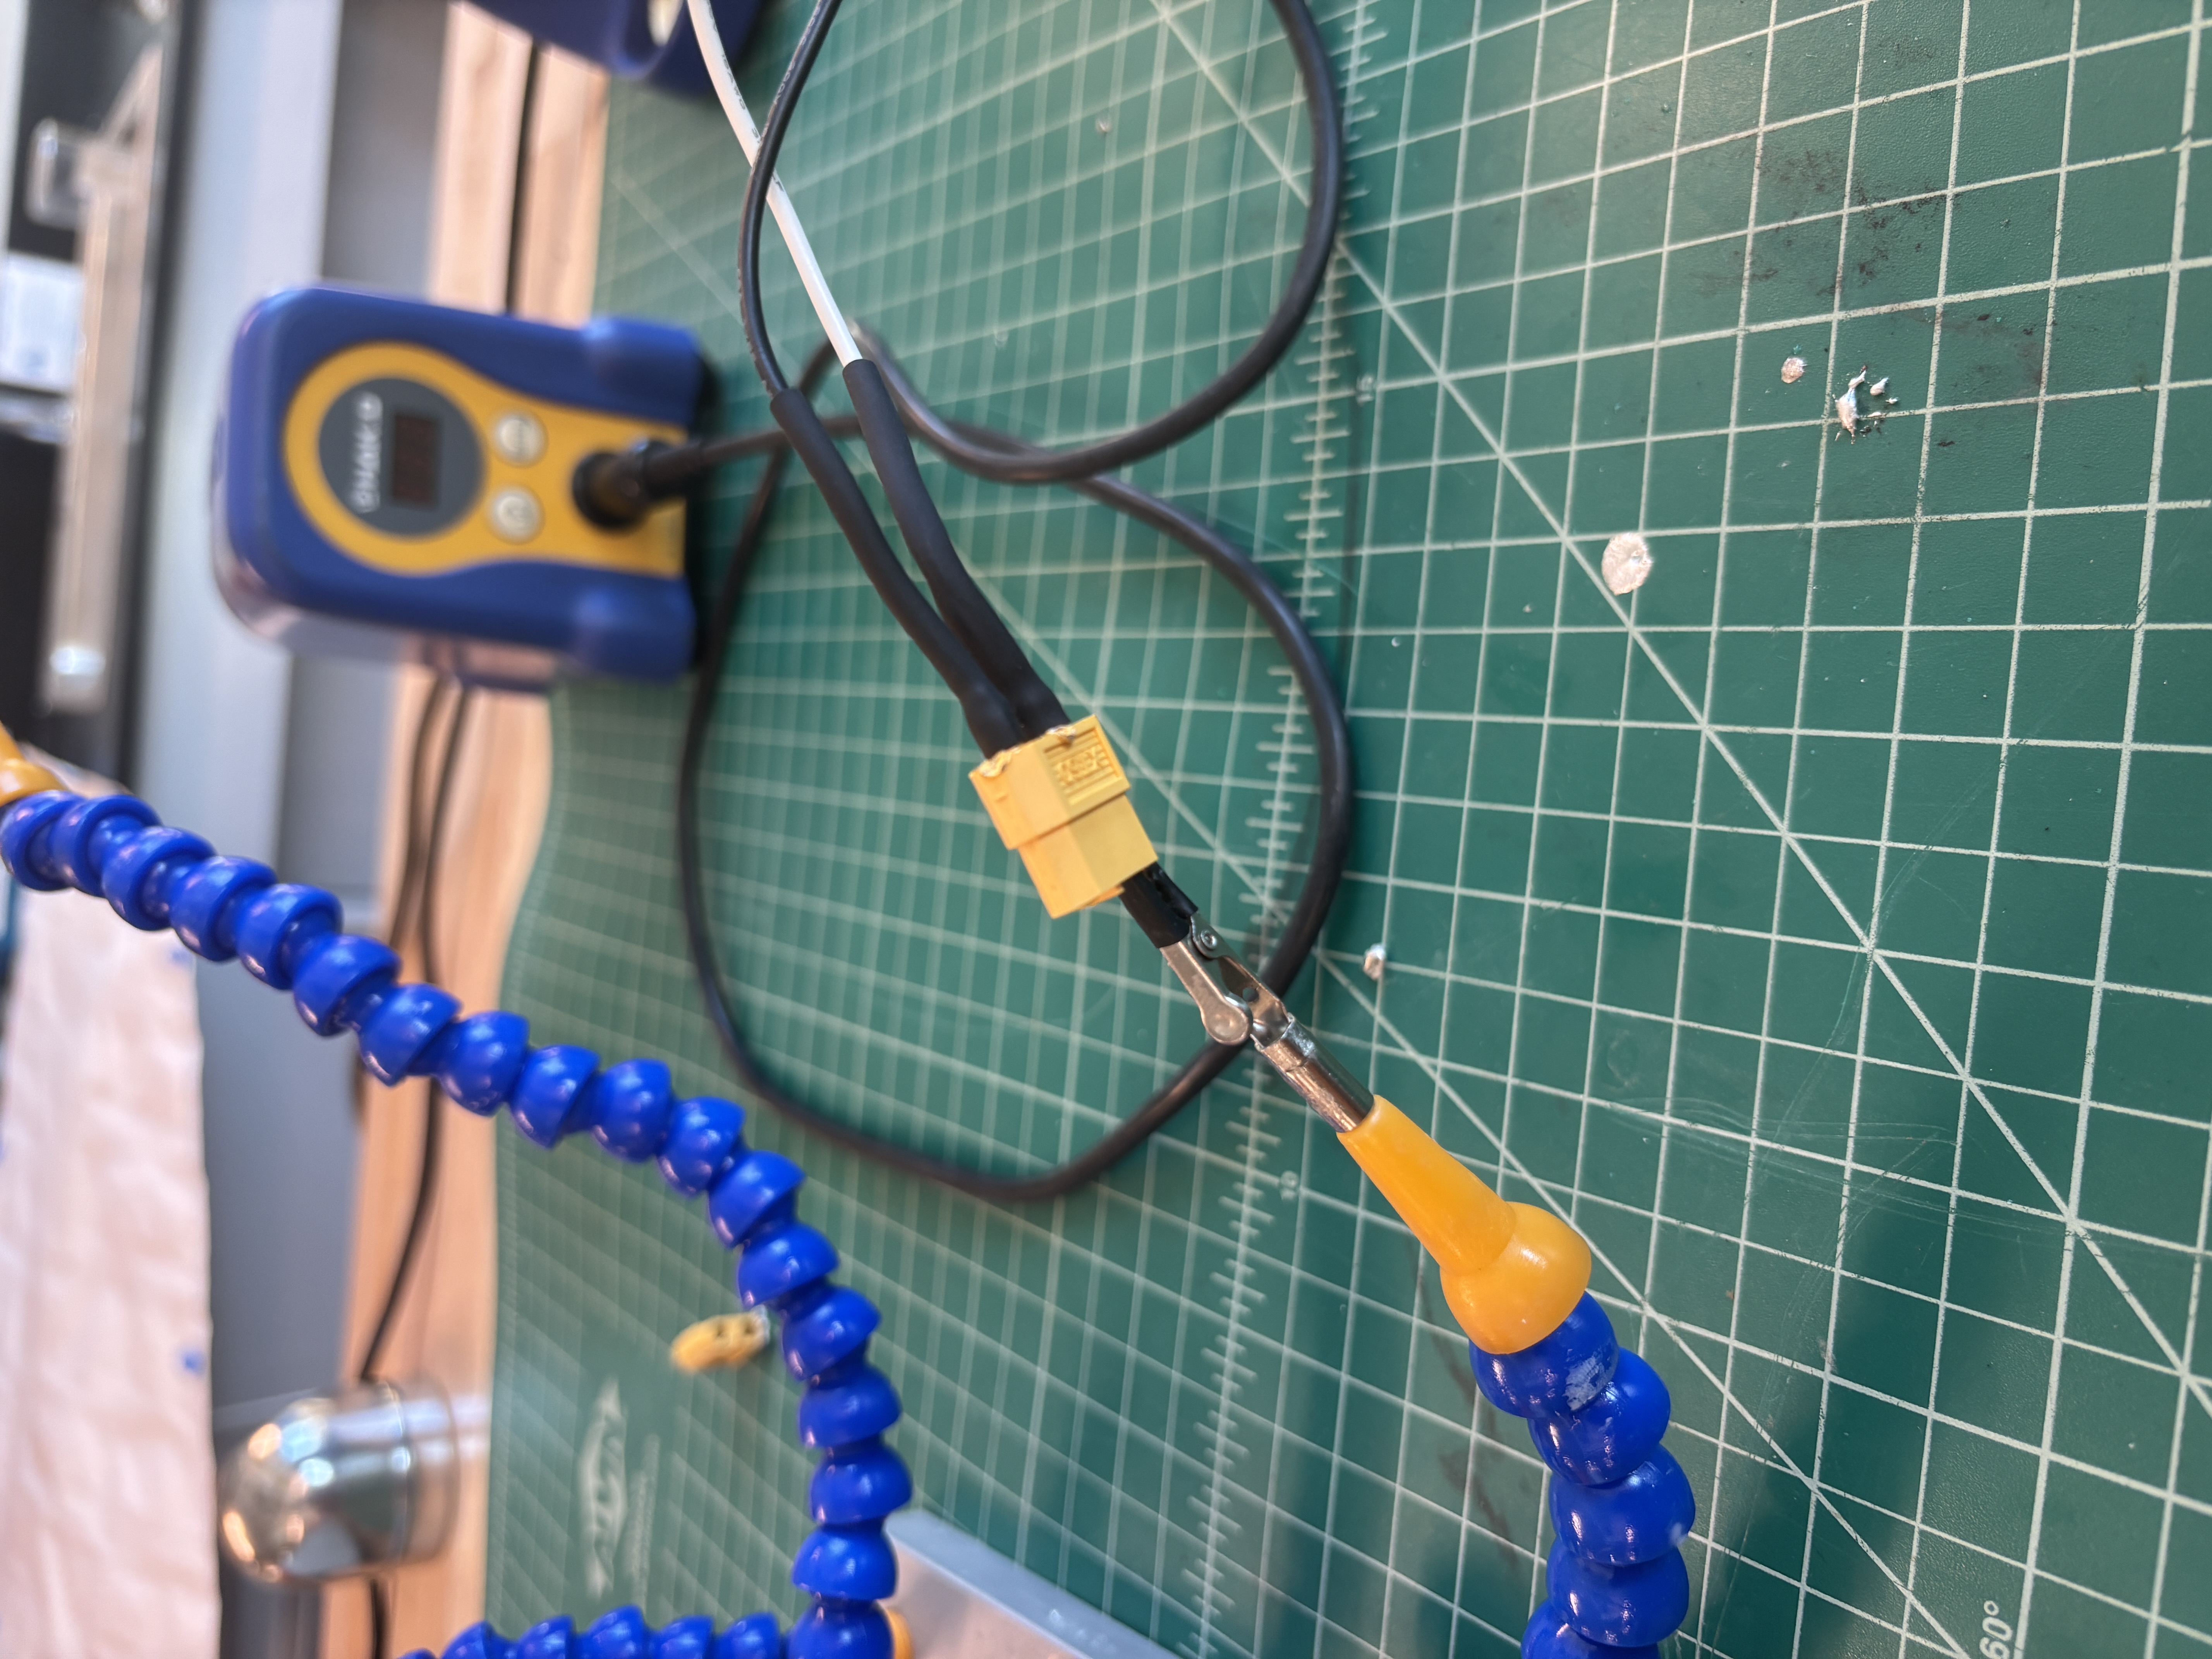
Fortunately, fixing this is not too bad. All you need is a new XT60 connector, a soldering station, and ideally a WAGO inline connector. Why use the WAGO inline connector? The main issue here is you cannot slide the wiring through the end cap when the new XT60 connector is soldered on. After you slide the wiring through, soldering on the XT60 connector can be stressful; you don’t want to get any tin on your robot. Forutnately, using the WAGO inline connector, you can separately solder the XT60 connector to some wiring. Then you can easily attach it to your penetrator wiring.
Now, you should be done. After putting back together your robot you are now ready to test the housing pressure again. Pull a vacuum, monitor the pressure, and repeat any steps as needed.